💦 Drink Smart, Live Well!
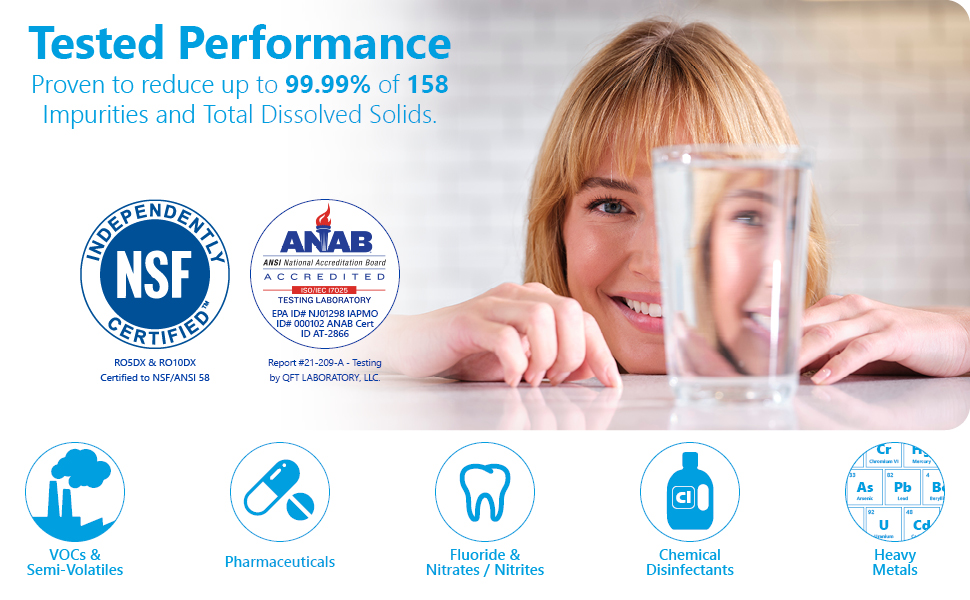
The EXPRESS WATER Reverse Osmosis Alkaline Water Filtration System is a 10-stage water filter designed to remove up to 99.99% of harmful contaminants while enriching your water with essential minerals. With a user-friendly installation process and a compact design, this under-sink system ensures you have access to high-quality drinking water without the hassle of refilling or professional installation.
H**Y
Great RO at an amazing price (Highly recommend purchasing a permeate pump as well)
I've had RO systems for the better part of 20+ years. Our household goes through a lot of fresh water daily, so having an RO system has paid for itself many times over. Even if you don't go through a ton of water for drinking, cooking, iced tea, etc...the convenience of not having to buy unlimited amounts of bottled water and/or filling water jugs at your local water store is definitely an added bonus. I've had 3, 4 & 5 stage RO units throughout the years and they've all produced great tasting water. My past 3 or 4 RO units (which are usually purchased when we move houses) have been Watts Premier models. They specialize is very fast & easy filter changes and they are definitely easy filter changes. However, you pay a little larger price for that convenience. Their 4-stage RO units run about $200 and the yearly filter changes run about $60. RO units also have 2 types of faucets: 1) faucets with an air-gap and 2) faucets without an air-gap. By definition: "Air gap faucets were designed to protect the RO system. In the event of clogging, a small amount of air, rather than dirty water, would go back into the RO system". The air gap will always make some noise when the tank is filling as air and water pass through the drain line and sound escapes from the little air gap hole. The Watts Premier RO systems have an air gap. If your system has an air gap, you cannot replace the RO faucet with a non-air gap faucet...you need to replace the faucets (if necessary) with the same kind. During my most recent search for an RO unit to install in a new home purchase, I came across this Express Water RO unit at an amazing price (which included a year of filter changes). I was a bit skeptical given the price, but the amount of solid reviews made it an appealing option. I made the purchase and had friend help with the install since I am a large framed man that does not easily fit under the sink area. After a month of use, I can say I am very happy with the taste, performance & overall experience with the RO. With that said, I found myself missing the benefits of the permeate pump that I had installed in my last house. If you just care about the RO review, then I am very pleased and give it 5 stars. If you want to know what a permeate pump is and WHY you should get one, read on.This is the permeate pump available on Amazon that I purchased and am reviewing below:https://www.amazon.com/gp/product/B005VPPRX4/ref=ppx_yo_dt_b_asin_title_o06_s00?ie=UTF8&psc=1Let me start by saying I will NEVER have another RO system without a permeate pump again. Permeate pumps use the wastewater that is expelled during the RO process to greatly increase water pressure at the RO faucet, minimize wastewater and fill the tank in less time. They can be installed on nearly all standard RO systems aftermarket so there’s no need to buy a bundled RO system that includes the permeate pump (since most of those cost a lot more than buying the units separately).I was introduced to permeate pumps about 4 years ago. I purchased a Watts Premier RO system from Costco (when they still sold Watts Premier) and had it installed by a plumber (since I needed a hole drilled in my granite countertop). I consider myself pretty handy and although plumbing in general isn’t rocket science, I’m a large framed man that hates trying to squeeze under sinks to do pretty much anything plumbing related. After the RO was installed, I was getting smaller (and broken) pieces of ice at my refrigerator since my RO was feeding my ice maker through a longer 1/4” line from the kitchen island to the refrigerator. This a drawback of a lot of RO systems which feed ice makers that aren't in very close proximity. After researching I came across a permeate pump (sold through Watts Premiere) and made the purchase. The included instructions were specific for the RO unit I had and it was an easy install since the RO was already up and running. Immediately, you will notice several things with the permeate pump. 1) Permeate pumps make some noise. They generally click or “thump” every few seconds. This happens because the wastewater from the RO builds up pressure inside the pump that is then used to push fresh (permeate) water into the storage tank. When the pressure builds and releases, you get clicking or thumping until your tank is full. 2) Your RO faucet pressure increases dramatically. As a result of the increased permeate water being forced into the storage tank, the tank pressure within the tank bladder increases and you end up with water pressure comparable to your regular faucet. The line pressure at the refrigerator & ice maker (assuming you have them all hooked together) is also the beneficiary of the increased pressure and you get full sized ice cubes again.So, why wouldn’t everybody want one of these? Well, I think most people have never heard of them. If you have, then the results speak for themselves. HOWEVER, these do make noise...especially if your RO faucet has an air gap (that little hole in the back of the faucet that inevitably leaks water out of it when the drain line gets blocked with something). With an air gap, permeate pumps get VERY NOISY. The pump action not only clicks (or thumps) under the sink, but the air gap sound created from the pump gets much louder as well. The air gap noise on my Watts Premier Pure Plus unit was so loud I actually debated on getting another permeate pump in our new house. I ended up buying a highly reviewed non-air gap RO system from Amazon and had it installed for a month in my new house. As usual, the water taste and purity was perfect and I am pleased that my ice cubes were normal sized (since the builder installed a larger RO line from my island to the fridge). I just realized how much I was missing the RO tank pressure (which equates to faster filling of water jugs & cooking pots). I went back to Amazon and found this permeate pump which said it was the newer model that makes less noise. The unit arrived in about a week (no 2-day prime shipping available for it). I watched a YouTube video for installing it on a basic 5-stage RO and had it all hooked up in about 20 mins. I’m once again in RO bliss. The water pressure in the faucet just makes me smile...no more waiting a minute to fill a normal glass with water (OK it’s not literally a minute but felt that way to me). The noise is considerably less from the pump itself. I ended up buying some u-shaped plastic clamps (Amazon search: TmallTech Big Simple Clip Clamp 2.5" Bracket Reverse Osmosis RO Membrane Housing (Pack of 3)) that hold the permeate pump to one of the RO filters so the pump is not directly mounted to the cabinet wall (like it was at my previous house). Also, since I don’t have an air gap on this RO faucet, I have no additional noise from the faucet. If my house is silent, you still hear the pump cycling the water, but it’s minimal and it’s only until the tank is full. After that, it doesn’t cycle back on until water has been used from the tank. All in all, I missed the permeate pump benefits and will never have another RO system without one. I will also make sure I don’t get an RO with an air-gap faucet either.Hopefully this review helps people.
D**K
Best Value for RO Drinking water system on the internet!
I purchased the 5 stage home drinking reverse system on March 1st, and it arrived at my north central Ohio home on March 6th. I was pleasantly surprised when I opened the box. The unit is a quality built unit, with a manifold that houses the 3 standard filters on the bottom, with the RO filter and final charcoal filter on the top, in the horizontal position. The unit was complete with fittings to connect it under the sink, and includes the sink faucet with a nice mounting washer that fit in an existing hole in my stainless steel sink. It even included the safety clips for all of the push to connect fittings that makes them nearly impossible to come apart if the clip is in place.I installed the system on Saturday, the 7th. If I were to mount this under the sink, as it was intended, I am sure that everything I would need would have been there, except maybe for a fitting to tie into the water line. The one supplied is for a different size line than the ones in my home. I installed the unit in the basement up in the floor joists. I hung the manifold by two screws into a floor joist, next to a beam, so if I ever finish the basement, I would not have too much hanging down. The tank was 11-1/2” diameter, and it would not lay above the beam as I had hoped, so I ripped down a 2X4 to 2-1/2” wide, and tied it onto the 9” floor joists with a couple of dry wall screws, and put a piece of plywood on it with some more drywall screws and laid the tank on the shelf, directly behind the manifold.I wanted this unit to supply water to my sink, my refrigerator, and my Keurig coffee pot. I tied into the water line, through an existing saddle valve that was used for water to the refrigerator. I ran the supply line, about 10’ to the RO unit, and fed it through a supplied valve. The plumbing was very easy and straight forward. I did add a permeate pump, which I also purchased from Amazon. It was the ERP1000-JG-S and it came with fittings, some tubing, and a mounting bracket which I attached to the manifold on the left side by drilling two holes. I probably would not have needed the pump as I have 70psi water pressure, but my water is from a rural water company, and is fairly expensive and I didn’t want to put too much down the drain so the permeate pump would waste much less as it relieve the backpressure the RO water puts out as it tries to fill the tank and uses the waste brine as the pumping power source.I stepped the ¼” output line to 3/8” and ran it through a “T” to branch over to the sink, and back to the refrigerator and coffee maker. Near that end, I stepped it back down to ¼” to go to those appliances. This allowed me to make a longer run with less pressure loss.I also purchased the HM Digital TDS-EZ Water Quality TDS Tester and it arrived before the RO system, so I tested the water and it was 172ppm Total dissolved solids. I took the tester to work, and compared it to a similar unit we had at work as we have a large, commercial RO unit there that produces up to 600 gallons a day. The low cost HM Digital read identical to the high end unit we had at work. On my first batch of RO water, I tested it and it was at 19ppm TDS, which is a great number considering, the first tank gets dumped as it had impurities in it from the coating on the RO membrane and the other filters. After two weeks, the water quality has settled in at about 15ppm TDS.The water from this unit tastes great, with absolutely no odor, and is of very high quality. I ran around for a day, testing every brand of bottled water I could get my hands on with the HM Digital TDS meter, and found that the water through the RO system is as good as, and better than most bottled water you buy. I doubt that you will find a better unit than this for twice the price. I looked at the big box stores, and most of the RO systems they sold used custom filters that they rip you off for. The filters in this unit can be purchased at a lot of different vendors, and the four extra filters they supply makes this an even better value. They do not supply an extra RO membrane, but that is usually rated to last up to 24 months so it won’t need to be replaced until after the extra filters have been exhausted. Plus, if you want a higher capacity unit, you can purchase a higher capacity RO membrane, which I may do when I wear this one out after a couple of years, but for right now, it supplies all the clean water I need.One last note, if you are looking for a Keurig coffee maker with a water supply, you may not find it. I added a Okeler Adjustable Mini Plastic Float Valve which I also purchased from Amazon to mine as I got tired of filling it everyday.
J**S
Don’t get get intimidated, do have tools on hand
For anyone thinking of buying this, installation requires drilling- for some sinks a hole for the faucet is required, but mine actually had a spot for it ready to go. A hole for the drain saddle valve will also be required, and that probably won’t be there unless you’re renting and someone else installed one (hilariously this was the case in my place). The rest is doable with basic stuff like a Philips screwdriver.Installing the unit is a lot of work but none of it was hard. I am decently handy, but my plumbing experience is near zilch and I still did fine. I appreciated the color coding, labeling and directions. I was able to assemble the whole thing from following the manual without having to do any internet searches to supplement what was provided. The only warning I’d give someone putting this together is, make absolutely sure you push the lines in as hard as you can to prevent leaks. I didn’t push the one that goes to the cold water line in far enough and got sprayed in the face the second I opened the valve.As far as the end result, so far so good. I just had my first glass of water from it and it tastes excellent. Pressure is good too, I didn’t need a pump to get it working but I did see other reviewers mentioning it. If this review hasn’t been updated in a few months that means I haven’t found anything to complain about.