We remain fully operational. Our teams are working around the clock to ensure your deliveries continue safely.

下载应用程序


Buy anything from 5,000+ international stores. One checkout price. No surprise fees. Join 2M+ shoppers on Desertcart.
Desertcart purchases this item on your behalf and handles shipping, customs, and support to Taiwan.
🎉 Elevate your dessert game—because ordinary cake pops are so last season!
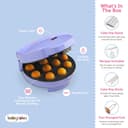
The Babycakes Cake Pop Maker is a compact, 760-watt kitchen gadget designed to bake 12 cake pops simultaneously with a non-stick surface for easy release. It includes a decorating and cooling stand, 50 sticks, and a fork tool, making it a complete kit for effortless, professional-style cake pop creation at home. Its stable design features non-skid feet, a latching handle, and a power indicator light, perfect for family celebrations or impressing your social circle with trendy treats.


| ASIN | B0050JRZR2 |
| Best Sellers Rank | #20,434 in Kitchen & Dining ( See Top 100 in Kitchen & Dining ) #1 in Cake Pop Makers |
| Brand | Babycakes |
| Brand Name | Babycakes |
| Color | Purple |
| Customer Reviews | 4.3 out of 5 stars 4,701 Reviews |
| Global Trade Identification Number | 00778890013829 |
| Included Components | (50) paper sticks, Cake Pop Maker, Cooling stand, fork tool |
| Item Dimensions D x W x H | 9.84"D x 8.07"W x 4.72"H |
| Item Type Name | Cake Pop Maker |
| Item Weight | 3.6 Pounds |
| Manufacturer | Select Brands Inc (Kitchen) |
| Material | Plastic |
| Material Type Free | PTFE Free |
| Number of settings | 1 |
| Other Special Features of the Product | Manual |
| Product Dimensions | 9.84"D x 8.07"W x 4.72"H |
| Product Style | Casual |
| Special Feature | Manual |
| UPC | 735343571084 778890013829 655772008589 |
| Unit Count | 1.0 Count |
| Voltage | 120.0 |
| Warranty Description | 1 year limited |
| Warranty Type | Limited |
| Wattage | 800 watts |
S**X
So fun and easy to use!
What a fun and easy product! My 8 year old granddaughter loved it! We used it right away! The instructions made it so easy and fun, make sure you read the tips too! Don’t overfill the holes is my best advice! Highly recommend for beginner baker and family yummies!
F**S
Great cake pop maker and bonus of takoyakis!
I will be real, I did mainly buy this for cake pops, but I'd be lying if I said that was the only reason. This also works just fine as a makeshift takoyaki cooker. I have an overwhelming obsession with takoyaki, and they're quite hard to find in restaurants. Even when I do find them, they are never freshly made (though the flavor is never compromised as far as I can tell; granted, I've never had a real, fresh takoyaki, other than these of my own creation). The cake pop batter that I made using the included recipe was much runnier than normal cake batter, and I think when I make another batch, I'll probably choose to use a regular batter recipe instead. It made the cake pops very light, airy, and unsatisfying. I did a small bit of research, and according to other users of this product, nothing is compromised by using normal batter, so I recommend that. Also, a tip for anyone bothering to read, if you want the sticks to stay in the pop when trying to dip/coat it with candy melt, dip the stick in the melt first, just to get a smidgen of melt on it, then stick it in the cake round and use your finger or another stick to smear the melt around the area. After that, put them in the freezer for a few minutes to harden it, and the cake pop will no longer fall off of the stick while you're trying to coat it! For more concise instructions, I watched a cake pop video by The Icing Artist to learn this trick.
K**E
Quickly and easily made tons of cake pops!
Super easy and fun to use! This cake pop maker comes with everything you need to quickly make the perfect cake pops. It includes a recipe book for different flavors of batter and glaze. I followed the recipe for vanilla cake pops and had a few dozen made in just 20 minutes or so. Its very easy to fill with a piping bag - I found that they came out better when I filled each spot completely, and it only took one or two batches before I got the hang of it. As for decorating, the stand makes it easy to do 12 at a time and can be put in the freezer for chilling them. Overall, I was very impressed by the ease of use and the quality of the cake pops that this product made!
H**M
LOVE IT! Could love it more... UPDATED!!
For $25 (at the time of my purchase) I decided to ignore the very polarizing comments and simply take a gamble on this product by myself. Prior to owning this machine I had never even TRIED a 'cake pop' the concept of the frosting mixed into the cake and formed into a ball sounded so gross to me. I was thrilled to come across this machine and discover that I can make cake pops out of JUST cake! Hooray! I also bought 175 Best Babycakes Cake Pop Maker Recipes at the same time. I went with the lemon cake pop recipe and followed the recipe just as instructed. It took me a few tries to get the amount right - I tended to put less in the well than I really needed. Ultimately that bottom well pretty much needs to be totally full. In reference to those that had non-rising, non-sphere shaped cake pops all of those issues seem to me to be a baking issue and not a fault of the machine. These issue can arise due to the eggs not being room temp, the butter being too hot, or possibly the recipe wasn't calibrated for this particular 'oven' and needs to be adjusted accordingly. None of the 1 or 2 stars seemed to me to be a direct result of the machine itself. However, I'm not in their kitchens to know for sure - but for me I get sphere shaped cake pops every time without issue unless I failed to fill the well full enough. In the cookbook there are also recipes for meatballs, appetizers, in addition to the cake pops - I have used this machine and I have made their Mexican Meatballs - and they were delicious! Cooked them all the way through in under 5 minutes. Made just enough for my whole family and I didn't have to stand at the stove pushing around meatballs for 15 minutes! LOVED IT! Although when they say to use a non-stick spray they REALLY MEAN IT! Do not skip that step or cleaning your Babycakes maker will be quite a pain! **UPDATE** Now that being said they also recommend that in between each round of cooking to clean off the trays - this is realtively easy if you use a wash cloth (to avoid burning yourself or having to wait to cool it down) If you don't - no matter how much non-stick spray you use it will STILL be a pain to clean. So is it really worth it to cook the meatballs in it? Ehh I don't think so, BUT the recipes that are in the cookbook listed above translate just as well to a pan on your stove top! Why doesn't it get 5 stars from me? The cord is REALLY short. Yes, if you have an electrical outlet immediately in front of your 'work station' it's plenty long enough, but if you need to use an outlet that is lower on your wall or further away from your work station you need an extention cord and that seems silly. It didn't need to be miles long, but an extra 8-10" would have been MUCH more functional for a more universal length in home-appliances. Additionally, the light system for ready/power is a tad confusing. Ready to cook or 'ready' time is up? It simply means it's hot enough based on the instructions - so you have to use a seperate timer for the pops themselves. I'd really like to see a timer built in. Or perhaps just less confusion - maybe that's just my own issue though. :) I saw other negative reviews saying it was 'tinny' and not well made - I say if you've owned a George Foreman and think that was of good quality then you won't be disappointed AT ALL in this product. I personally think that the metal wells that are within the device are made of better quality than a GF. I certainly will buy this again as a gift for some of my friends that have kids, like to entertain, or just for a fun whatever. I HIGHLY recommend if you are going to buy this machine that you buy the cookbook that was written specifically for this product. The recipes are great and there are a ton of tips on how to use your machine, make the pops, and clean it even! Buy it for $20-$25 you can't go wrong - some cake pans alone are $20 and you can make a whole lot more than simply the one shape cake pop with this device! **UPDATE** I also recently gave it a go using some store-bought funfetti mix. Worked great as far as creating the sphere shape, but I have to say that the ball wasn't as dense as the mixes that they provide in the cookbook. Not sure what the difference is specifically - but overall it still worked and was able to create a cake pop just fine. :)
P**.
Truly non stick
I chose this because my grandsons are always begging for cake pops and I can't always find them at the stores near us. It looked easy enough. BUT, sometimes looks can be deceiving. Not in this case!! The recipes are tasty and the instructions accurate. The unit is small enough to make storage easy. At first I thought i was going to have a mess with the spill over dough (see Pic) but after cooking it peeled off easily. I would suggest you loosen and remove the balls first though. With only a 4 minute cook time, you can have a dozen cake balls quickly. The recipes seem to make a batch for at least 2 makers (2 dozen balls) full at a time. I would also suggest you make a double batch of the glaze if you intend to coat and "sprinkle" your cake balls. As the smell of a cake baking folds the kitchen, be ready for the parade of diners. I recommend did anyone who loves cake pops!!
M**L
Great Product for making cakepops quickly...
I purchased this item to make cakepops the "easy" way. Prior to ordering this machine, I became impatient and made cakepops the traditional way. If you've ever made cakepops, this is a breeze compared to the multitude of steps you need to make them the traditional way so this was a relief... Upon receiving this, I made a batch of cakepops which came out so-so despite watching reviews/videos. I used boxed cake mix and the balls came out mostly round, some off (as others mention the top and bottoms not lining up correctly), some UFO's and some that just weren't round. I used some boxed cake mix and substituted milk for water as some had suggested, even let the batter sit out. I was mostly satisfied with round 1... Following, I did another round of cakepops for easter...in addition to decorating easter eggs, we decorated cakepops which was a huge hit for the kids! this time again, I used boxed cake mix and I suppose because I had the experience of round 1, these cakepops came out PERFECT. no irregular balls...all perfectly round... My suggestions: -don't use this for the first time and expect to have perfect pops. Moreover, don't use this the night before you are planning to have some pops for an occasion...practice a bit because this and dipping to have a clean look takes some practice...make sure whatever you're dipping in is thin enough so that there is not too much weight/thickness in the coating. As the excess drips, it pulls on the pop and you could have a pop fatality ( i had many of these during round 1...round 2 i'm happy to report NO fatalities)! I would suggest if using chocolate, thin it down...if not, use thinned down candy melts/almondbark/non tempering chocolate... -If you are ok with just a plain cake flavor, this will be perfect for you. If you are looking for that extra moist and extra dense flavor of traditional cakepops, this is not for you...however, this will suffice for an activity with the kids or just a quick something to impress with at your next get together. most of the people I have had taste test between the two have liked traditional cakepops better taste wise... TIPS: -Cooking time...-if you are a perfectionist as I am, it doesn't take 6 minutes for your pops to finish...so don't even count on using that as a guide. Rather, use your own judgement. I believe waiting 6 minutes will give you dry, if not burnt pops. I used pillsbury cake mix and i'd set my timer for 3 minutes, open it and all the pops were almost done. I would then flip them over to get even coloring and leave them for about 30 seconds...voila...perfect pops...experiment though because I imagine different cake mixes and flavors will vary in cooking time... -don't spoon in the batter because the machine gets rather hot and if you want even cooking amongst your pops, opt for piping them in. I don't suggest a ziploc bag with the corner cut off...too messy... -fill the wells up to almost full...meaning not quite at the top of the well but just below. I've found that they make perfect pops. If you underfill, your pops will be lopsided, If you overfill, you may come out with saturn looking pops... -If you use boxed cake mix, substitute milk for water and so far, pilsbury has been the most successful for me...it's thicker and holds together better than some of the more watery cake mixes... Overall, this is a GREAT product that does exactly what it says it will...wouldn't give it anything less than 5 stars as it performs...anything less is due to the user vs the product itself...
S**A
Into burnt cake pops? This is the device for you!
I was so excited about this cake pop maker, but holy buckets, what an epic fail! Seriously - unless you really enjoy endless amounts of frustration, run away now. Burnt cake pops every single time. I bought this cake pop maker in hopes of making a really fun treat for my daughter's birthday. I read other reviews about burnt cake pops but was won over by the positive reviews. It's so easy! Hah - yah right. To be on the safe side, I did my homework. I read the instruction booklet cover-to-cover not once, but twice. I googled. I watched YouTube videos. I did everything I could to prep myself for making some great cake pops. Alas, it was not meant to be. When it came time to using the cake pop maker, I did everything "by the book." I used the recipe in the instruction booklet and didn't start pre-heating the device until I'd make my cake pop batter. I powered up the maker, and the red light came on, but the green light never came on. I waited and waited and waited, but no such luck. By the way, the whole light thing is super confusing because the instructions say "Lower the lid to closed position and allow the cake pop maker to preheat for a few minutes. When ready, the red POWER light will be illuminated." The immediate next instruction says "When the cake pop maker has preheated to the proper cooking temperature, the green READY light will illuminate." So which is it? Red or green?? In any case, I let mine preheat for 15 minutes, and the green light never came on. I decided, given the smell and how hot the device was, that I would go ahead and try cooking. I loaded up my cake pop batter, closed the lid and set the time for 4 minutes. Holy smokes - literally. Smoke was POURING out of the machine, and the timer still have over 3 minutes on it. When 4 minutes were up, I checked the cake pops - the bottoms were undeniably burnt. Like unsalvageable. At least they came out of the device without sticking (sigh). Destined to not show up for my daughter empty-handed, I tried another batch. Same result. I had to go through over 8 dozen batches in order to get 22 reasonable cake pops. And here's the crazy method I had to use: 1) Turn off hot cake pop maker 2) Just before filling, turn back on 3) Fill cake pop maker and close lid 4) Bake for 2 minutes 5) While still on and baking, flip closed cake pop maker upside down. This is not a joke. I literally had to turn the maker upside down to get slightly not burnt cake pops. 6) Bake upside down for 1 1/2 minutes 7) Flip cake pop maker back upright and check. Usually, the cake pops were (beyond) done at this point. Fingers crossed my frosting job was good enough to mask the burnt taste. I will never look at a cake pop the same again. Bonus points to whomever suggested using a piping bag to get the batter in the maker. That was a life saver.
A**E
Easy clean-up; chintzy latch
My daughter had been begging me for a cake pop maker and after looking at the different options, I decided to get this model. I love the speed with which it bakes the cake balls (about 5 minutes at sea level), and after a bit of trial and error to get the right amount of filling, I had pretty good success getting reasonably round cake balls. The waffle-iron-like set up works very well, and the nonstick surface is wonderful. I had no trouble extracting the balls with the fork (especially after I realized it was OK to stab the balls, which are going to be frosted anyway). Clean-up was super easy--just wipe the cake pop maker with a damp dishcloth. My only complaint is that the latch is very poorly designed and chintzy. It is loose and rattles (at least on the model I received), and it doesn't always hold the lid all the way closed. It took me a couple of batches to realize that as the cake balls rose, they were pushing against the top of the cake iron, and sometimes the pressure from the steam and the cake caused the lid to pop open. As a result, the cake balls closer to the hinge were more finished, with a rounder shape, while the ones closer to the latch were lumpy due to uneven baking. You have to keep an eye on the appliance and reclose it if you notice it popping open. In my first effort (in which I produced about 50 cake pops), I don't think I got a single one that was perfectly round, and I don't know if it's possible to get a perfect globe. However, frosting covers most of the imperfections. I recommend putting the stick into the top of the cake ball, where the baking is less even and the shape may be a bit lumpy, because the bottom half of the ball is always perfectly domed (thank you gravity!). As for the "saturn rings" mentioned in some of the other reviews, which are caused by overflow, I found it very easy to trim these off (they can be basically pulled away from the cake). In a few batches I had entire mats of overflow--but I actually found these delicious! They were like very thin toasty wafers. A very creative cook could find a use for them. For frosting, I agree you MUST freeze the cake balls and get them very cold--the instructions say to leave them in the freezer for 15 minutes; I would recommend closer to an hour. Meanwhile, the frosting should be fairly thin and hot so that it hardens as soon as it hits the cold cake. I also recommend working in very small batches (<5 cake balls), and keeping the frosting in a double boiler so it stays hot and thin. My first batch I was working with about a dozen cake balls and a bowl of frosting mixture which I'd microwaved according to the instructions. The first couple of cake pops came out great, but as I continued to work, the cake balls warmed up and the frosting cooled down (even though I kept sticking it back in the microwave). By the end of that first batch, the frosting was too thick and the cake pops were threatening to fall off the lollipop sticks. For my second batch, I put the frosting bowl over a pot of boiling water and pulled just 3-4 cake balls out of the freezer at a time, and things went much better.
TrustPilot
1 个月前
2 周前