❄️ Upgrade your outdoor faucet game—freeze-proof, fuss-free, and built to last!
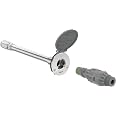
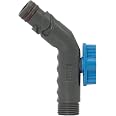
The Aquor House Hydrant V1+ is a frost-free, freeze-proof outdoor faucet crafted from 316L stainless steel and military-grade polymer. Featuring 7x better freeze protection than brass, a quick-connect system for effortless hose swaps, and a sleek concealed design, it offers professional-grade durability and backflow prevention. Backed by a limited lifetime warranty, this 12-inch slate gray hydrant ensures maintenance-free, worry-free outdoor water access year-round.

| Material | Stainless Steel Acetal Polymer |
| Brand | Aquor |
| Item dimensions L x W x H | 13.75 x 3.25 x 3.5 inches |
| Exterior Finish | Stainless Steel |
| Inlet Connection Size | 0.5 Inches |
| Inlet Connection Type | National Pipe Tapered |
| Outlet Connection Type | Garden Hose Thread |
| Number of Ports | 2 |
| Outlet Connection Size | 0.75 Inches |
| Specification Met | ASSE 1019C, ASME A112.18.1, CSA B125.1, AS/NZS3718 |
| Valve Type | Ball Valve |
| Manufacturer | Aquor Water Systems |
| UPC | 850007299071 |
| Part Number | HHP012 |
| Item Weight | 2.2 pounds |
| Product Dimensions | 13.75 x 3.25 x 3.5 inches |
| Item model number | HHP012 |
| Size | 12 Inch V1+ |
| Color | Slate Gray |
| Finish | Brushed, Polymer |
| Installation Method | Single Hole |
| Item Package Quantity | 1 |
| Number Of Pieces | 2 |
| Hose Length | 13.75 Inches |
| Spout Height | 3.44 Inches |
| Spout Reach | 3.88 Inches |
| Handle Material | Acetal Polymer |
| Mounting Type | Wall Mount |
| Special Features | Lead-Free, Quick Connect |
| Included Components | Wide Grip Hose Connector, 3x Mounting Screws, Debris Cover, Stainless Steel Hydrant, 1/2" FNPT Straight Inlet |
| Batteries Included? | No |
| Batteries Required? | No |
D**E
Easy, easy to install, easy to use.
This item was really easy to install yourself and easy to use. Works great. For your install make sure you don't buy one that is too long. If you follow what I'm saying the install is easy. If you don't follow and make the same mistakes i dud it could be more of a pain in the .....This is hoe I di it in case you want to know.Measure from the spigot base to the first bend of your pipe. (If your pipe is straight from the spigot and stays straight for a number of feet then thats even better get the longest one) if not the measurement doesnt have to be very accurate. You just have to make sure you buy one that will go though the wall and os shorter then your pipe before it bends. (of course you can put it in no matter what but for easy easy easy this is the way)This was the first mistake that I made. If you are ordering the 6 inch one it's actually 8 inches long. Add 2 inches in over all length to the item and then add about an inch and a half for your shark Bite ( which I'll get to) so this means if you measure the length from your outside spigot base to the first bend in your pipe, Say it is 10 inches then you want to order the 6 inch one. To be safe add 4 inches to the length for proper fitThis is exactly what I did and it was easy. My pipe was 10 so I got the 6 inch one.1 Shut off the water.2 Unscrew spigot3 Get a pipe cutter and cut pipe as close to the outside wall as close as you can. ( you may have to use a hacksaw)4 widen hole in the wall because typically the aquar was wider than ither spigots i had ) widen hole of needed using a drill and hole saw5 put your sharkbite onto the aquar with pipe tape and tighten. ( if you don't know about these sharkbites you can get them any home improvement store like lowes , home depot they snap into your pipe and you dont need to solder (sodder) a pipe or use clamping tools. If you look at my pictures you will see what one looks like)6 Put the aquarium spigot in the hole and see what length it is to your pipe. Mark your pipe where the end of the sharkbite is ( the sharkbite goes in less than a quarter-inch so give yourself a but extra. And then cut ( use liquid paper or any marker you can see on a pipe.)7 cut your pipe again, remember you can't add but always take away.8 put aquar and the sharkbite , that you already put together into the hole and click your pipe in. ( you will literally hear a click. )8 screw the aquar to your wall on the out side and you are done. Don't forget the plastic cover and angling piece they give you so your aquarium drains properly.I've done three of these so far and I can do it less than a half hour now. This thing is made great and looks and operates fantastic. Already multiple friends have bought and used them . Everyone loves them and there is nothing to say about them that isn't good
C**S
Its worth every penny!
If your like me I was hesitant because you never know what to believe online anymore! This is a true review! We love ours and I'm so glad I took the plunge and bought it! We are actually going to buy 2 more now! Its definitely super easy to install and very convenient! It’s exactly as described. It’s perfect for the winter time, as you’re just unscrew it and you don’t have to worry about it freezing and busting. I wish we would’ve bought this years ago. The pressure is perfect. The quality is 100%. I love the modern design. There has not been any leak it’s definitely worth the money!
M**I
Impressive outdoor faucet
I'm that homeowner who has lived in the Midwest a long time, changed multiple homes but never had the outdoor faucet fail on me - the traditional big box store type. Well - recently - I did have a water line leak inside the ceiling of the basement that led to my repairing the water line and looking for a new faucet to add. Stumbled across the Aquor brand, researched it and thought I'd give this a try. The faucet is WELL MADE, install was a breeze and operating it has been a wonderful change to the old skool turn faucet I used to have - just twist the connector in and voila, garden hose is delivering water. Even had my SO mention that this looks so much professional as opposed to the old style faucet. Really happy with the purchase. Test of time will be this winter as to whether water really drained out and whether any freezing affected operability next Spring. But given the construction - I'm pretty sure that is unlikely to happen. all will be well next Spring.
M**G
Easily installed by an average homeowner.
My old "frost free" garden hose hydrant had frozen and cracked over the winter. It was spraying water out from underneath the siding when I turned the water on. In a panic, I called a plumber, but they said it would be a couple of days before they could get to me.I remembered seeing a YouTube video of this product a little while ago. I spent a about an hour looking at how to install this thing before I decided I could tackle this project on my own. I canceled my service call with my plumber, ordered this, hoping that everything would go smoothly with my limited plumbing knowledge.I shut off the water to the bib, and cut off the old hydrant. Everything looked straight forward enough.. I picked up a 1/2 inch male copper pipe adapter, a 2 foot section of 1/2 inch copper pipe, and a 1/2 inch quick connect coupling from the local hardware store.I cut about 2 inches from the new copper pipe, and soldered the male copper pipe adapter to it. Then I widened the hole where my old hydrant was at, to 1.5 inches with a hole saw. The trick to widening an existing hole with a hole saw is to use a section of the wooden dowel in the existing hole, as a guide, so your hole saw doesn't skip all over the place. Then I put plumber's tape on the adapter/pipe section I had just soldered, and screwed it onto the Aquor unit.I put the unit in the wall first but did not screw it down yet. It's much easier to work with the pipes when the unit hasn't been screwed down yet, so I went and used the quick connect coupling to connect the unto to my plumbing. I could have soldered the connection together but there's a method to my madness of using the quick connect coupling. Using the coupling will allow me to take apart the Aquor unit, if I ever need to replace the O Rings inside it. Quick connects allow you to twist the pipes in it, if I had soldered the connection together, I would have to unscrew the unit from the wall to replace the O rings.Once I was confident everything was hooked up right, I prayed to baby Jesus, for everything to not leaked, and cranked on the water. To my surprise, everything was perfect. Not a drop of water in sight.I went outside, realigned the unit, put the cover and wedge behind the unit and screwed everything in place. Total cost of materials other then the unit was about $21. It was took me about 1 hour to complete the total installation, not counting the time it took me to go to the hardware store. I am just an average homeowner with no plumbing experience besides soldering a couple of pipes that had frozen before.The product itself is built nicely and looks like it should last a lifetime with proper maintenance. The plastic adapter that you screw into your garden hose is made with a super durable polymer. I don't know exactly what it is, but it's not your typical plastic. I can see it holding up to 5-6 seasons of use.If you have been wanting to replace your old garden hose, or if you need to replace it because of a failure, go for it. This product is dead simple to install, anyone can do it.
K**W
Good product so far. Not sure how long it will last.
Easy to install, easy to use. I worry about how long the plastic fitting will last, as it is already showing scratch marks after being used three times.
TrustPilot
1 个月前
4天前