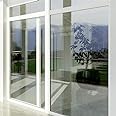
🌞 Keep your space bright, cool, and protected—because your windows deserve the best!
The BDF NSN70 Window Film offers a premium transparent solution that combines exceptional heat rejection and 99% UV protection with a very light tint. Measuring 24in by 24ft, this durable, scratch-resistant metal film is designed for easy peel-and-stick installation, making it perfect for professionals seeking energy savings and interior preservation without sacrificing natural light.
Item Dimensions L x W | 24"L x 24"W |
Size | 24in X 24ft |
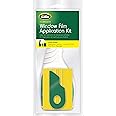
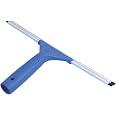
Installation Method | Peel and Stick |
Color | Black |
Ultraviolet Light Protection | True |
Material Type | Metal |
A**Y
You can do this!!! This is the same stuff the pros use.
I love this window film! I paid much more to have a very similar film professionally installed on some windows in my home. For these smaller bedroom windows, I decided to take it on as a DIY. I followed the directions and took my time and I couldn’t be happier with the results! My son‘s room stays much cooler and you can’t tell that the windows have tinting by looking at them. For reference, the lower left window in the photo has no tint and the three other window panels do, but it doesn’t make it look too dark at all. I really wanted this to block the UV light from fading furniture and floors and to keep the house cooler and was happy it doesn’t make it dark. Bonus, I noticed this really takes away lots of glare on a sunny day, too! It was also nice that this set came with a sharp X-Acto knife and a squeegee. I’ll definitely be ordering more for other windows in my home!
A**G
Updated: Fabulous product
One side of my new build house is south facing and after multiple rounds with the heating and ac folks I decided to try this film to reject the heat. I’ve completed the bottom half of three windows and wanted to share how clear this goes on. It’s a little difficult to work with as it’s not very forgiving- even without losing control of it I still have one or two little spots where it looks like it’s been folded and therefore creased. I saw another review where it apparently went away after a few days so I’ll update this with this review to confirm, as well as give an opinion of whether or not the heat is truly reduced.Update: it’s been about 2 weeks and I really like this product. My extra ecobee sensor indicates that the pantry, which always runs hot (74-76 degrees when the thermostat is set at 70), is registering at 71. As I worked through other windows I tried two methods of install. The first was how the instructions say to put them on, by slowly peeling the product backing off as you worked to attach to the window, and the other way I tried, was I laid the precut piece on a table and peeled it all off there, and then I attached in one fell swoop.Option 1: it takes about 20 minutes to apply, and it appears there are little to no bubbles under the film. The film does peel off periodically as you are installing and will fold over on itself which creates creases that do not come out. Over time they will minimize but if you’re like me, you’ll see them. No one else will notice it, but it drives me crazy. I also noticed there were little bubbles and almost like a smeared effect on one or two windows at the bottom and the bottom corners. Overall, it gives a clean look but definitely leaves a few blemishes, even after a few weeks of adhering. I suspect it’s because I couldn’t really get the back of the film as wet as the window’s because It was already so close to the window, creating a more dry, and therefore more difficult hang.Option 2: after I peeled the film backing off, I would apply a lot of the spray to both the window and the film, then line it up from the center and let it just do its thing. It behaves a lot like tempered glass for a phone so if you start in the middle of the glass and let go, it attached quite nicely to the window all by itself. Once it’s on, I then smoothed out as many bubbles as I could. I did panic a bit because it appeared smooth but when I came back an hour later I saw a lot of bubbles. It took about 7-10 days of leaving it alone, but they are completely gone now and the bottom and corners look great. You cant even tell there’s film on the windows. This way took me closer to 12-15 minutes once the film was cut so the more efficient install time also made it nicer to use this option.
C**R
Thermal window film
Not to difficult to install. Time will tell if you save money on energy costs.
A**R
Did not block us compared to window without film
The product was delivered on time and well packaged. We put he film on 1 window, and then placed identical colored construction paper in the window where the film had been applied. We then put the same construction paper in a window next to it without the film. You can see how the red has faded and the black has faded as well. These were in the window for 4 days. I expected to see very little change to the paper hat was behind the film. I was very surprised by how much fading happened in such a short time in general. I wish I could get a refund because this film does not protect 98-99% of us rays.
R**N
Doesn't really change the view
Pretty easy to install if you follow the directions exactly. There's a suggested video which is quite explanatory. Comes with the necessary tools. Use a large table to lay it out. Really press hard using the supplied squeegee to work out the liquid and bubbles. Measure the windows you want to do beforehand. I "guestimated" and came up short and had to reorder a second piece. After measuring your windows exactly, add 2 inches horizontally and vertically since you need a bigger piece during install and then cut away the overlap. Lay out the window squares on a simulation of the various sizes available to reduce the amount of waste. I -was- able to use the straight "factory edge" on a couple of the windows without cutting back. The main reason I installed it was to eliminate/reduce the UV bleaching my indoor carpets and furniture. After installation, the view through the windows is virtually unchanged.
R**O
Very difficult to install
I installed this window tint on my kitchen window before and I can't say it went well but I bought it again so it would match. I tried to do my doorwall with it and it was a total disaster. I have installed window tint in countless cars and never had the issues I had with this. I added dish soap to the water that activates the glue so the film is movable and doesn't stick to the window right away. This worked ok on the small window but on the doorwall as I said disaster. If you are a novice at this, this is not the product for you. I have a faidr amount of experience and I'm mot happy with the results.
A**B
Look at how-to videos first
This stuff is great, as long as you know how to install it properly. The difference in our home was immediate after installation. We have East facing patio doors and windows so the morning sun would come in hot! Not any more. We can use our breakfast bar without needing blackout curtains now. BUT make sure you take the time to see how to install it properly. We did what we figured would be 'good enough' for the first door and it's fine but not perfect. We followed the professional's steps for the second door and the application looks better and our relationship wasn't tested in the same way. Well worth the extra ten minutes of time. YouTube is your friend with this product.
TrustPilot
1 个月前
1天前