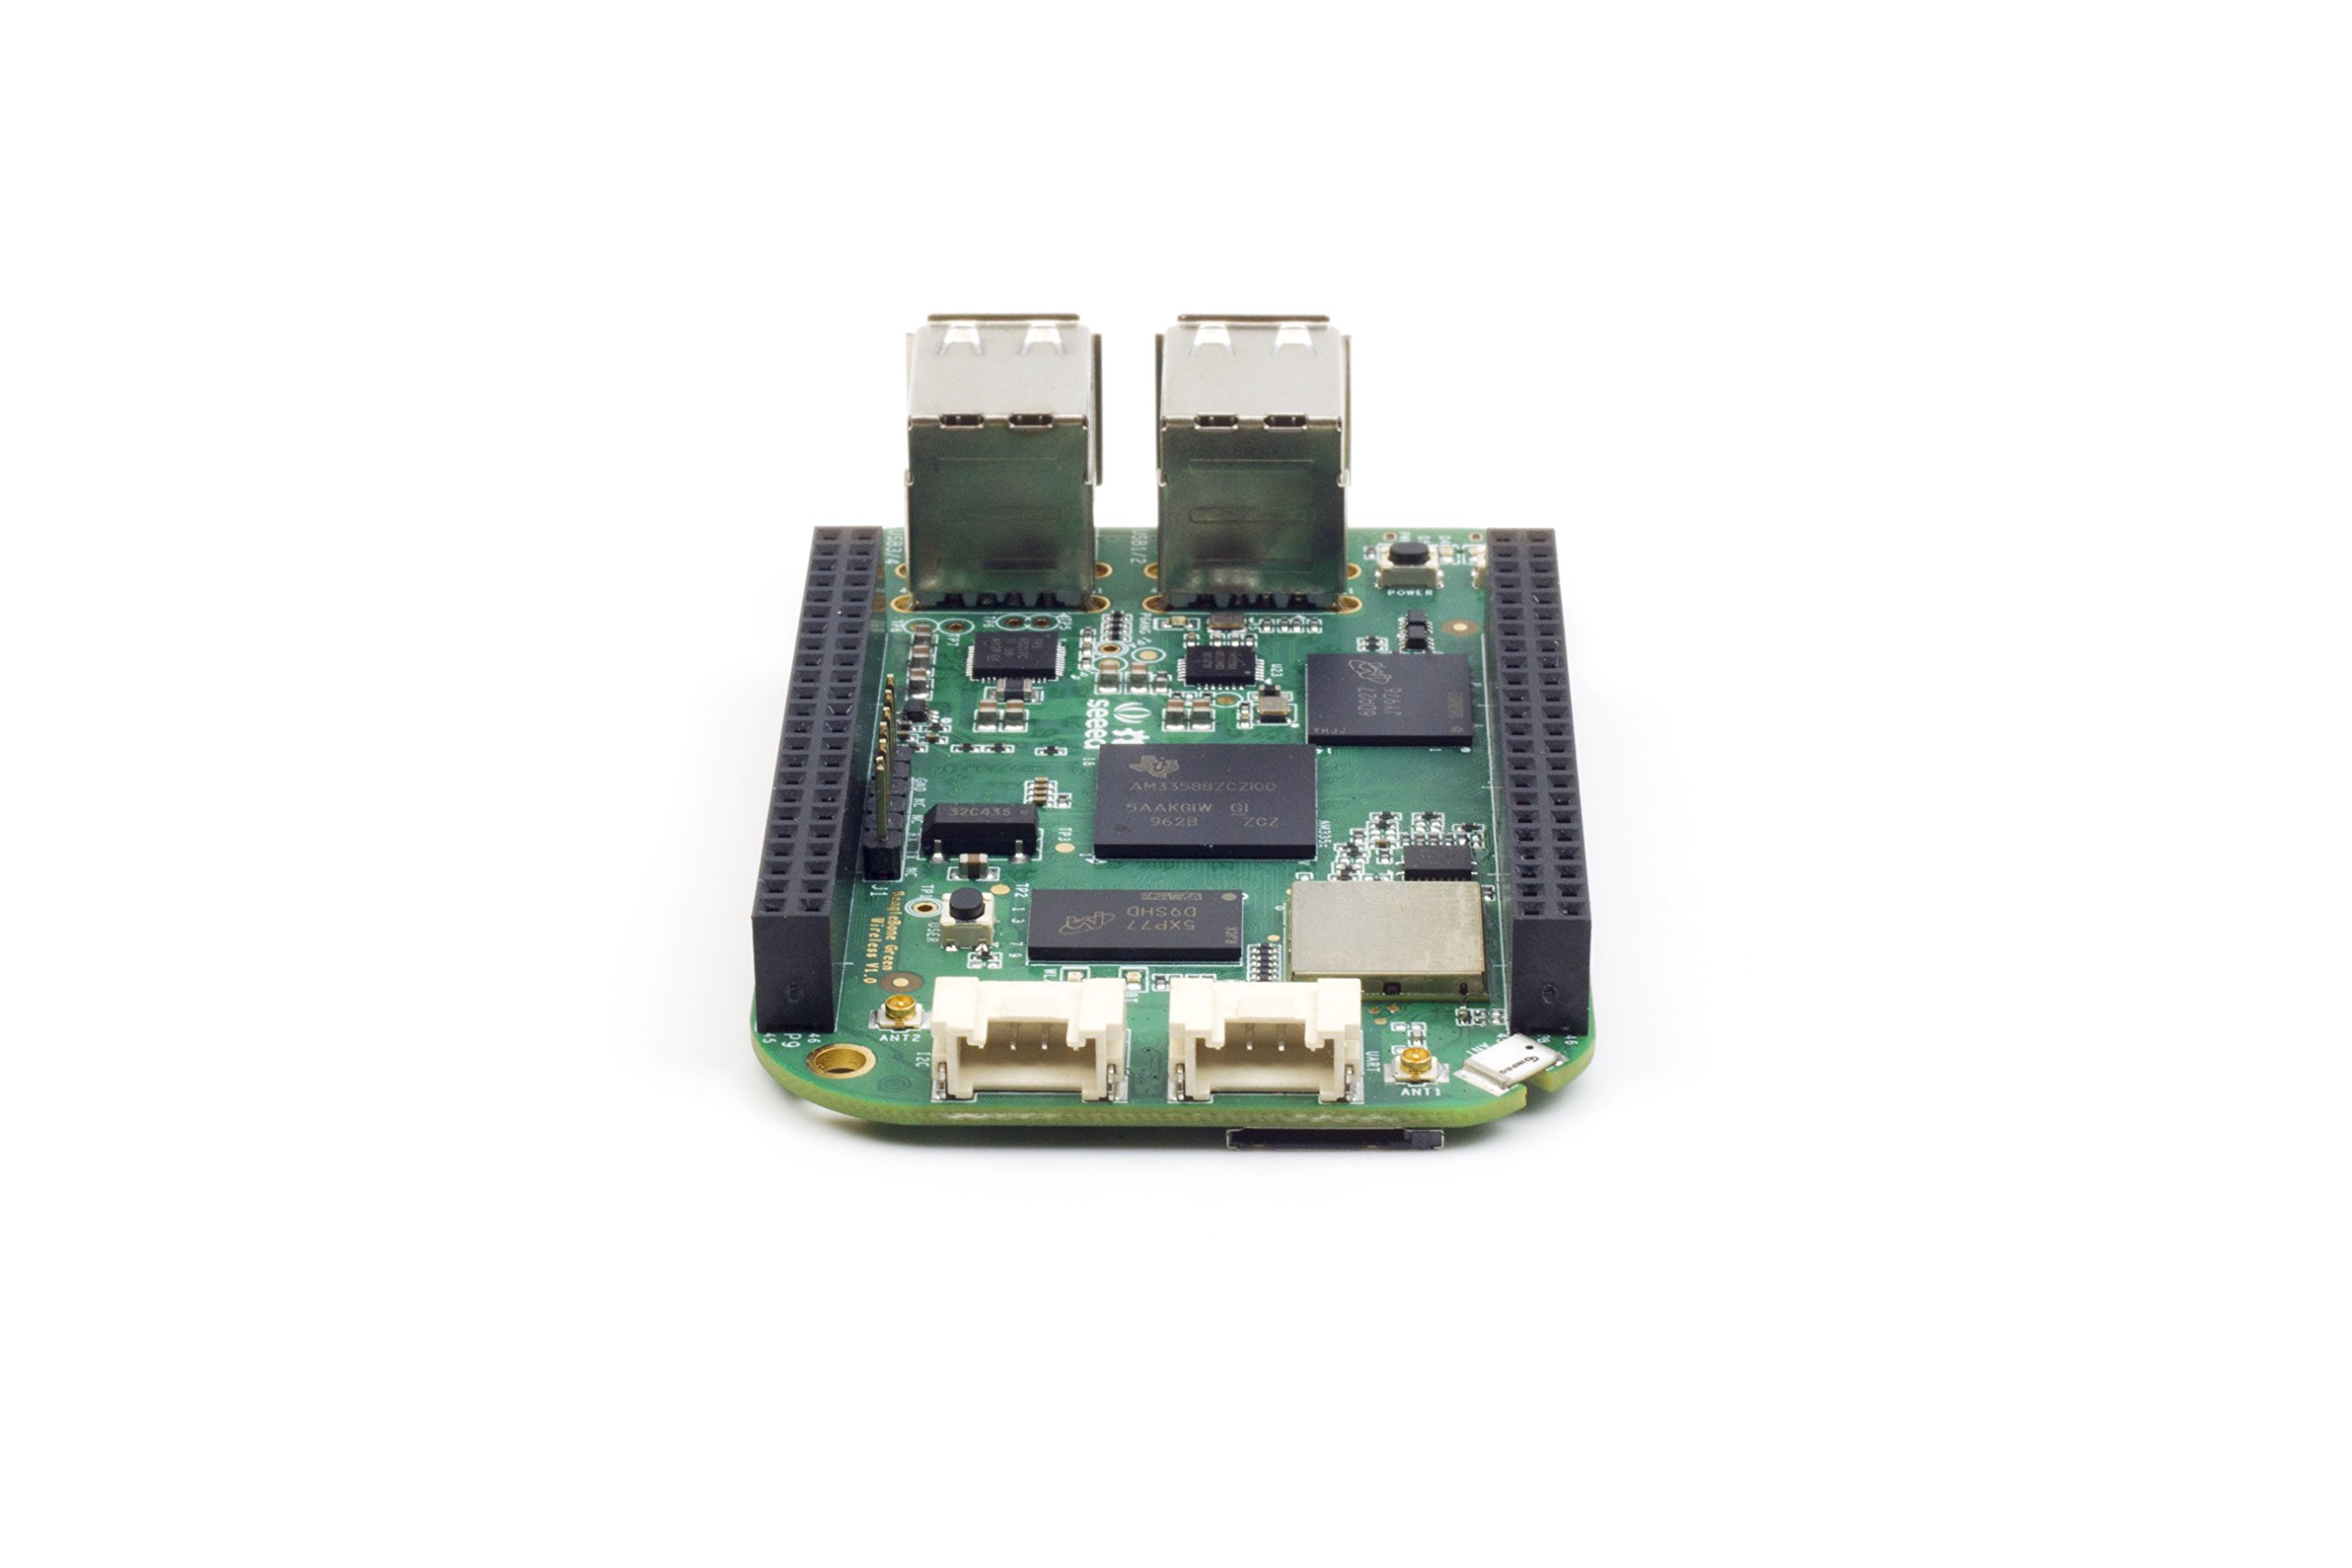
🚀 Elevate Your Projects with BeagleBone Green Wireless!
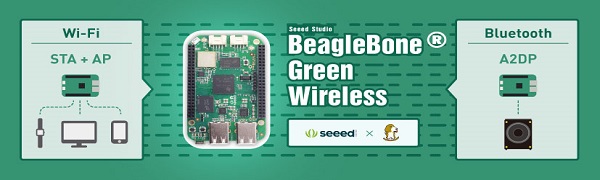
The Seeed Studio BeagleBone Green Wireless Development Board is a powerful and versatile platform featuring a 1GHz ARM Cortex-A8 processor, dual wireless capabilities (Wi-Fi and Bluetooth), and a rich array of connectivity options, making it perfect for rapid prototyping and a wide range of applications in IoT and automation.
Processor | 1 GHz |
Wireless Type | Bluetooth, 802.11bgn |
Brand | seeed studio |
Item model number | 102010048 |
Item Weight | 1.44 ounces |
Package Dimensions | 4.8 x 2.9 x 0.7 inches |
Color | BeagleBone Green Wireless |
Number of Processors | 2 |
Manufacturer | seeed studio |
ASIN | B01GFSDOTY |
Is Discontinued By Manufacturer | No |
Date First Available | May 31, 2016 |
F**Z
Almost as easy to setup and use as an Arduino
Worked like a charm out of the box. I really like the power off switch (something the Arduino folks should think seriously about) and the fact that on a Windows host machine, Cygwin completely eliminates any need for all the other options to connect to and/or monitor the board.Update on Day #2: Notwithstanding everything I said before, the thing played havoc with my home WiFi when I tried configuring the WiFi on the board, the WAP disappears if I plug in a WiFi dongle in a USB port, and even the SSH gets hosed somehow, requiring multiple shot-in-the-dark remedies on both the Windows machine and this board to get back to where you were to begin with.DO NOT buy it, its an ill conceived concoction of "stuff" that leaves it unusable for practical applications.
E**O
High Power IoT
The hardware is excellent so far. Seeed Studios has limited ability to support this board, but has tried to answer questions or to redirect to another source. There are numerous sources on line that are relevant to the BBB or BBGw.This board, with WiFi on and answering a continuous PING from a network laptop, was powered for 3 hours by an unplugged 2600 mAh phone battery extender. It was still operating when the test was ended.
S**.
Great BeagleBone, but have a USB-tty handy.
This is a fantastic headless beaglebone.It is a bit of a pain to set up if you're not using it as an access point. Since there is no ethernet, nor display, the serial over usb functionality comes in handy. However, this functionality is somewhat limited & I'd recommend having a USB to 3.3v TTY adapter or FTDI handy to interact directly with the terminal, images, and debugging.
J**O
Excellent value for the money!
Costing the same as the BeagleBone Black, I think the BBGW gives you more features, like the wireless connectivity and -if you use their sensors- the Grove connectors. For IoT projects you won't miss the micro-HDMI and probably you will trade the Ethernet port to welcome WiFi instead!
B**D
Five Stars
great product
W**E
Great if you know GNU/Linux
Here is my 10-Step 'HOWTO' on how i got the BBGW 'out of the box' to work standalone on my network.Basically:1. I first navigated to BeagleBoard.org's 'getting started' web site.2. Since I don't use any Microsoft products, I downloaded and installed the HoRNDIS and FTDI drivers for my Mac, and then rebooted.3. Then I attached the included stubby USB cable to the BBGW, and plugged it into my Mac.4. The BBGW booted, and I waited until two of the USR lights on the board started to 'dance' in unison.5. Next, I selected the 'Beaglebone' wifi Access Point (which didn't require a password). NOTE: It's not necessary to do this! Just if you want to see the 'Getting Started' stuff. Also note: If you see another 'Beaglebone' wifi AP, but it requires a password, use 'BeagleBone' (finally found that buried in /etc/network). You'll also see a FAT-formatted partition on the BBGW mounted on your system.6. Next, I opened a Terminal, then SSH'd into the BBGW with: ssh [email protected]. (This was possible due to the RNDIS driver, which allows networking over USB)7. To start WiFi configuration, I then ran the connmanctl program from the command line. (Do a web search on "Debian wifi how to use" to see the exact steps or read below on this page).8. I then quit the connmanctl program after wifi was configured and shutdown the BBGW.9. Disconnected the BBGW from the USB cable.10. Attached a 5V power supply to the micro usb and rebooted - then SSH'd into the BBGW standalone. If you log in as the user 'debian,' the password will be 'temppwd'Initial ImpressionsThere's a lot to like about this Texas Instruments-CPU'd device... 4 USB ports are welcome here, along with the 1GHz CPU... and honestly, only 500MB RAM isn't too hobbling due to the low memory requirements of most ARM clients... lots of little LEDs and lights (nearly all controllable through software)... the four USR lights are especially handy as an indicator of power, CPU, microsdhc (card slot) and Emmc activity. (The 'heartbeat' and CPU LEDs 'dance' in unison when the system is a'runnin'!). And I think the built-in 4GB eMMC storage was a brilliant addition - quite handy!As a bonus, the included stubby USB cable also works with Raspberry Pi Zero as a USB/Power/Networking RNDIS ( Remote Network Driver Interface Specification) cable!And 69 (65-addressable, IIRC) GPIO ports! there are going to be plenty of accessories for this computer! not only that, but you can also get many different cross-hardware-platform sensors to attach to this device.This is a nice little GNU/Linux computer, but honestly, the documentation is very lacking and for a n00b very confusing... the example 'howto' sheet included with the BBG didn't work for me - but then, where do you go? do you use BeagleBone.org's info? or Seeedstudio's BeagleBone Wiki? or the eLinux Debian wiki? who provides the best single-point of support? (hint: it ain't Seeedstudio)... i did get a friendly few comments on the beaglebone IRC channel, but getting this thing up and running from scratch, especially if you don't know GNU/Linux, is going to be a challenge for some folks.At this point i have a fully functioning BBGW. But boy howdy, those included wifi antennas are hideous, aren't they? But then again, some folks (especially Amateur Radio ops like me) love antennas. I haven't tried the antennas yet as the built-in wifi connects just fine to my AP 20 feet away. The small ceramic wifi antenna on one corner of the BBGW's board is more than adequate for my use - it may be interesting to do some antenna modeling of the performance of the two antennas (which look like two tiny amateur radio Buddipoles)This is a new product, so give it some time to garner support and popularity... but if you're new to GNU/Linux, especially on the ARM platform, a Raspberry Pi3 might be a *much* better device to start with - just MHO, YMMV. However, if you're a die-hard embedded device programmer wanting to scratch a real-time performance itch, this could be your dream device.There's no HDMI on this unit. I ordered, then tried an HDMI 'cape' - and at the time of this writing it is not supported under the 4.X.X-series of Linux kernels. I may explore a USB 2.0 HDMI adapter at some point. I hope the HDMI cape will be supported in the future, and will update this page when it works.Fine Tuning the DistroOne potential initial stumbling block for n00bs (especially those new to Debian): Repositories became available after issuing:sudo apt-get updateThe only real base system configuration needed was to have the correct timezone. A simple:sudo dpkg-reconfigure tzdatafixed that for me.Some System Stats and Showing the BeagleBone Green Wireless Serial NumberIf you look along the cape rail along the ceramic antenna side of the BBGW, you'll see a sticker stating the serial number and MAC address. You can get the serial number from dmesg output by grepping for 'BBGW':$ dmesg | grep BBGW[ 2.234539] bone_capemgr bone_capemgr: Baseboard: 'A335BNLT,GW1A,BBGW16055468'Obviously you'll use either awk or cut to extract just the number:$ dmesg | grep BBGW | cut -c 69-80BBGW16055468I haven't dug into the kernel source to see how the number is extracted. There are a few handy CPU-related utilities under /usr/bin:/usr/bin/cpufreq-aperf - calculates average freq over set time/usr/bin/cpufreq-info - report cpu freq kernel info/usr/bin/cpufreq-set - modify cpu settings (under- or over-clock)You'll find other info under the /sys directory:$ ls /sys/devices/system/cpu/cpu0/cpufreq/affected_cpus related_cpus scaling_governorcpuinfo_cur_freq scaling_available_frequencies scaling_max_freqcpuinfo_max_freq scaling_available_governors scaling_min_freqcpuinfo_min_freq scaling_cur_freq scaling_setspeedcpuinfo_transition_latency scaling_driver statsA number of these values report "." I have yet to explore over-clocking (no real reason to with a 1GHz CPU, but hey...). Some of the values found under the 'governors' directory are:conservative ondemand userspace powersave performanceI'll assume that these correspond to other GNU/Linux ARM distros. As usual, if you seek information, you must go to the source:[...]Oh, and want to monitor the CPU temperature of the BBGW's TI CPU? It's not supported unless you install an external hardware sensor.Configuring and Booting a Current Beaglebone.org Release on microSDHC on the BeagleBone Green WirelessBeing an intrepid and foolish person, I then proceeded to try configuring and running a 'bone' distro from the microsdhc. First, I followed the link to Beagleboard.org's listing of software images. The latest listed there at the time of this writing is bone-debian-8.4-lxqt-4gb-armhf-2016-05-13-4gb.img.xz. Here are the steps I used to get my BBGW booting from the release on microsdhc:1. Decompressed, then burned the image file onto a spare microsdhc.2. Inserted the card into the BBGW. Attached an FTDI USB TTY cable to the J1 connector on the BBGW, then plugged into my Mac.3. Launched Zterm on my Mac and set a connection for: 115200, 8, N, 1 (Xon/Xoff was enabled).4. Held down the BBGW boot button. Then applied power. You'll see the power-up sequence, then the loading of the boot file and boot process. A fsck error will appear at first, but then BeagleBoard.org's Debian will boot:U-Boot 2016.03-00001-g148e520 (Jun 06 2016 - 11:27:44 -0500), Build: jenkins-github_Bootloader-Builder-395Watchdog enabledI2C: readyDRAM: 512 MiBReset Source: Power-on reset has occurred.MMC: OMAP SD/MMC: 0, OMAP SD/MMC: 1Using default environmentNet: not set. Validating first E-fuse MACCould not get PHY for cpsw: addr 0cpsw, usb_etherPress SPACE to abort autoboot in 2 secondsIf you press the spacebar, the booting process will halt. You can then continue the boot process by using the keyword 'boot':=> bootswitch to partitions #0, OKmmc0 is current deviceScanning mmc 0:1...gpio: pin 56 (gpio 56) value is 0gpio: pin 55 (gpio 55) value is 0gpio: pin 54 (gpio 54) value is 0gpio: pin 53 (gpio 53) value is 1switch to partitions #0, OKmmc0 is current devicegpio: pin 54 (gpio 54) value is 1Checking for: /uEnv.txt ...1179 bytes read in 10 ms (114.3 KiB/s)gpio: pin 55 (gpio 55) value is 1Loaded environment from uEnv.txtImporting environment from mmc ...Checking if uenvcmd is set ...gpio: pin 56 (gpio 56) value is 1Running uenvcmd ...1197 bytes read in 42 ms (27.3 KiB/s)debug: [/boot/vmlinuz-4.4.9-ti-r25] ...7833256 bytes read in 466 ms (16 MiB/s)debug: [/boot/initrd.img-4.4.9-ti-r25] ...4761957 bytes read in 295 ms (15.4 MiB/s)debug: [/boot/dtbs/4.4.9-ti-r25/am335x-bonegreen-wireless.dtb] ...61860 bytes read in 106 ms (569.3 KiB/s)debug: [console=tty0 console=ttyO0,115200n8 root=/dev/mmcblk0p1 rootfstype=ext4 rootwait coherent_pool=1M quiet cape_universal=enable] ...debug: [bootz 0x82000000 0x88080000:48a965 0x88000000] ...Kernel image @ 0x82000000 [ 0x000000 - 0x7786a8 ]## Flattened Device Tree blob at 88000000Booting using the fdt blob at 0x88000000Using Device Tree in place at 88000000, end 880121a3Starting kernel ...[ 1.998573] wkup_m3_ipc 44e11324.wkup_m3_ipc: could not get rproc handle[ 2.145972] omap_voltage_late_init: Voltage driver support not added[ 2.153245] PM: Cannot get wkup_m3_ipc handle[ 2.273559] bone_capemgr bone_capemgr: slot #0: No cape found[ 2.317525] bone_capemgr bone_capemgr: slot #1: No cape found[ 2.361534] bone_capemgr bone_capemgr: slot #2: No cape found[ 2.405520] bone_capemgr bone_capemgr: slot #3: No cape foundLoading, please wait...fsck: error 2 (No such file or directory) while executing fsck.ext4 for /dev/mmcblk0p1fsck exited with status code 8[ 10.326679] systemd-fsck[158]: rootfs: clean, 131433/935424 files, 834835/3775744 blocks12.132573] 7ystemd-fsck[237]: /dev/mmcblk0p2: clean, 43/1007872 files, 1382s0/4038912 blocks/[ 12.958821] remoteproc1: failed to load am335x-pru0-fw[ 12.994111] remoteproc1: request_firmware failed: -2[ 12.999320] pru-rproc 4a334000.pru0: rproc_boot failed[ 13.299615] remoteproc1: failed to load am335x-pru1-fw[ 13.312562] remoteproc1: request_firmware failed: -2[ 13.317790] pru-rproc 4a338000.pru1: rproc_boot failedDebian GNU/Linux 8 beaglebone ttyS0BeagleBoard.org Debian Image 2016-05-13Support/FAQ: [...]default username:password is [debian:temppwd]The IP Address for usb0 is: 192.168.7.2beaglebone login:5. Logged as root, then hit Return. HINT: I tried doing this also with the Adafruit cable and a little Linux boxen using minicom. But got stumped when I couldn't log in and the keyboard seemed unresponsive and there was no response on the terminal console. Why? Because by default, minicom is set with hardware flow control enabled!!!! You must run minicom as root to configure the defaults.6. Now run connmanctl. Now here's the part where I nearly tore out the few remaining hairs on my head: For the life of me it seemed that the wifi was unresponsive and would not scan for networks. I tried doing it manually, but got an error message that the wifi hardware didn't support scanning!!! The answer, thanks to a quick check of the connmanctl man page:tether wifi on | off ssid passphraseEnable or disable wireless tethering, as well set the SSID andpassphrase.You must turn tethering off for wifi! So I then issued:connmanctl> tether wifi offDisabled tethering for wificonnmanctl>7. You can then perform the rest of the connmanctl actions to set wifi:connmanctl> scan wifiScan completed for wificonnmanctl> servicesKAYZEEPUP wifi_deadbeef0000_4b41595a4545505550_managed_pskconnmanctl> agent onAgent registeredconnmanctl> connect wifi_deadbeef0000_4b41595a4545505550_managed_pskAgent RequestInput wifi_deadbeef0000_4b41595a4545505550_managed_pskPassphrase = [ Type=psk, Requirement=mandatory, Alternates=[WPS ] ]WPS = [ Type=wpspin, Requirement=alternate ]Passphrase? WTGD3g3gk69lwConnected wifi_deadbeef0000_4b41595a4545505550_managed_pskconnmanctl> quit8. Shutdown, and removed all cables.9. Held boot button down.10. Rebooted and SSH'd in via wifi standalone!Follow-on steps involved expanding the filesystem to take advantage of the (possibly) extra space on the card (and of course, the other normal apt-get update, user or timezone configuration, etc.) The good news is that this distro is a more complete release with X, a Desktop Manager, etc. The bad news is that this particular .img file only leaves about 35MB left on the root filesystem!Not a good thing. But easily taken care of (see below).Rant: It would be really nice to have a short step-by-step README included with each Beagleboard.org distro. Perhaps under /home/debian or /root?Expanding the Debian GNU/Linux Filesystem on microSDHCWith only 35MB left on the card but the distribution residing in a 4GB partition on a 16BG card, the next task was to expand the root filesystem. I tried some of the techniques thrown about - including one from Beagleboard.org - nada, zip, zilch, zero... So I took the easy way out:1. Made a little more room on the existing root filesystem:sudo apt-get updatesudo apt purge2. When I had about an extra 100MB, I then installed gparted:sudo apt install gparted3. Then started a vnc session (a vnc server, tightVNC, is already in place - thanks!):vncserver -geometry 1280x800 :14. then used a vnc:// URL in my browser from another computer on the LAN with the BBGW's IP address and session ID:vnc://192.168.1.23:59015. Fired up an X terminal and ran gparted. It's a snap to resize and it's done on the fly! (select the leftover space, reduce it; select the root partition, enlarge, then apply changes - bingo!)TIP: You'll run gparted as root using sudo, but it will fail unless you allow 'other hosts' to connect to your X session. Use the xhost command to enable the connection, then run gparted as root at your X terminal client command line:$ xhost + ; sudo gpartedBtw, both UXterm and QTerminal installed had horked font displays and wouldn't display proper keyboard characters! Fortunately Xterm worked fine. I later installed lxterminal as it works much better for my purposes (and it's what I use under Raspbian).You may also want to set up a small swap file. I use Samsung EVO+ 32GB cards which run about a Hamilton at the local electronics store or online. These cards give me a consistent 20MBs read/write, so I'm not really concerned about life cycle or how long they will last - I always have a backup, which is as easy as sticking a card into a USB carrier and copying the root filesystem. To make a little swap file - say 512MB - equal to the BBGW's RAM:$ sudo dd if=/dev/zero of=/swap bs=1K count=512K524288+0 records in524288+0 records out536870912 bytes (537 MB) copied, 33.9637 s, 15.8 MB/s$ sudo chown root:root /swap$ sudo chmod 0600 /swap$ sudo mkswap /swapSetting up swapspace version 1, size = 524284 KiBno label, UUID=5655bc03-837b-4531-a39f-44ea674c0449$ sudo swapon /swapNext, edit /etc/fstab:$ sudo nano /etc/fstabthen add:/swap none swap sw 0 0and swap should be enabled on next boot:$ freetotal used free shared buffers cachedMem: 503908 143140 360768 4952 13440 72756-/+ buffers/cache: 56944 446964Swap: 524284 0 524284After the next step below I had a nice dual-boot system!Configuring a Current Seeedstudio Release for the BeagleBone Green WirelessFollowing Seeedstudio's BBGW wiki links, I found the latest .img file (BBGW-blank-debian-8.5-seeed-iot-armhf-2016-06-20-4gb.img.xz at the time of this writing), downloaded it, then decompressed, verified the sha256, and then used ddrescue on my Mac to write it to an old 4GB Samsung microsdhc. After inserting the card into the BBGW, I booted to a reflash. The BBGW signaled the reflash was complete (all USR LEDs were lit).So now i have the latest release on the emmc! (and had to again reconfigure wifi, etc.). The output of uname and /etc/dogtag show:$ uname -aLinux beaglebone 4.4.12-ti-r31 #1 SMP Thu Jun 16 18:48:27 UTC 2016 armv7l GNU/Linux$ cat /etc/dogtagBeagleBoard.org Debian Image 2016-06-19This is kind of a bare-bones release. No X, Desktop Manager or other goodies. But with more than 1.5GB free on the eMMC there always apt-get, right? Anyway, the very next thing i did was to install gddrescue... this was to help me at least make a halfway OK backup of a functioning system... i then backed up the emmc to an inserted microsdhc card:sudo ddrescue --force /dev/mmcblk0 /dev/mmcblk1Backing up the emmc to a microsdhc takes less than four minutes on the BBGW using a Class 10 card (I use Samsung EVO Plus). I then verified that the image was working by rebooting with the Boot button held down until i could see the system being booted from the card slot and not emmc - now if i do 'brick' the machine i can get right back to work and reverse the process (according to Seeed, there are boot images you can download if you don't backup) Backing up your emmc to microsdhc is a great way to keep a current copy of your system. Before you reflash your BBGW, make sure to have working backup on microsdhc. I tried a BBGW test release from 2016-06-06 and it would NOT boot from a back up. The release documented here DOES work - which is a good thing. However, it appears that this only works with an un-modified system - as soon as I made changes, then backed up, the backup would not boot. There are a host of emmc tools under /opt/scripts that bear exploring, so I am hopeful to find a good solution.I do have some nitpicks about the BeagleBone Green Wireless:The BBGW needs more and better documentation. The BBGW's current System Reference Manual is somewhat lacking (32 pages vs the more than 130 pages for the Beaglebone Black). BTW, "Force to boot from Micro SD Card or Switch the Wi-Fi mode between AP and station mode " is the description for the Boot button on the Seeedstudio BBGW wiki, but there is NOTHING in the BBGW System Reference manual regarding this behavior - and instead, details are given regarding a boot order - including USB??? (have not tried this yet). Check out the wiki for related links.An install of vnc4server and then a requisite window manager/desktop system - lxde and lxterminal, along with the midori browser (from Debian's Jessie backports, which only required a simple removal of a comment hashtag from /etc/apt/sources.list) seem to work well.Finally, I highly recommend getting a 3V FTDI UART USB cable to use serial input/output login - very helpful to see what's going on during an initial boot of a new distro or install. Make sure it is a 3V cable!!!
TrustPilot
1 个月前
2 周前