Desert Online General Trading LLC
Dubai, United Arab Emirates
Desert Online General Trading LLC
Dubai, United Arab Emirates


🚀 Capture, Connect, Create — The Ultimate IoT Camera Board for Visionary Makers!
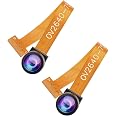
The Aideepen 4PCS ESP32-CAM-MB kit features four compact ESP32-CAM modules with dual-core 240MHz processors, integrated 2MP OV2640 cameras, and Micro USB to serial adapters. Designed for ultra-low power IoT applications, it supports WiFi and Bluetooth dual-mode connectivity, making it a versatile, plug-and-play solution for developers and tech innovators.


| Processor | 2.4E+2 |
| RAM | SRAM |
| Wireless Type | 802.11a/b/g/n |
| Brand | Aideepen |
| Series | ESP32-CAM |
| Operating System | FreeRTOS |
| Item Weight | 2.39 ounces |
| Package Dimensions | 4.29 x 3.23 x 2.01 inches |
| Color | 4 PCS |
| Number of Processors | 2 |
| Manufacturer | Aideepen |
| ASIN | B0BC1371J4 |
| Country of Origin | China |
| Date First Available | August 26, 2022 |
C**R
Use a Data rated USB Cable - not a charging cable or it will NOT work.
Worked as expected. Eventually.note: use a DATA rated USB cable - NOT JUST A POWER supply cable...I had two cables - both for charging things - neither had data - I didn't consider this and nothing would work. I installed drivers... chased after the wrong device... force installed drivers ... crashed windows... reloaded windows... finally asked ChatGPT.... first suggestion was ensure you are using a DATA CABLE... found a data cable for a kids tablet... AND they worked immediately and were recognized by windows... without installing any drivers.
W**W
Camera model not supported.
One set worked and the other did not . I noticed one camera had OV2640 stamped on the ribbon and the other did not have any camera model stamped on it. I tried both cameras on both MB's and the unstamped camera would not work with either MB's. The working camera would not work on the MB that came with the unstamped camera.Please send another OV2640 and MB replacement.Sense my first review I have changed the rating from two to five. The refunded my purchase and I purchased the same items and they all worked as expected.
K**A
When They Work, All Good
The first twopack of the cams did not work. Code could be loaded, but the cameras were DOA. Amazon immediately replaced these, originals being returned. However, the second pair work perfectly - one as a stand-alone camera; the other has been integrated into Home Assistant using ESPHome for setup.Using the Arduino 2.4.6 IDE, the code automatically downloaded to the camera with no RST or button pushes required.Painless...and had the first two not failed, this would get five stars.The Home Assistant camera was manually set up, using a boilerplate .yaml file from ESPHome, listed below. The initial code is created using the ESPHome Wizard, specifying "esp32cam" from the list. The updated .yaml file is processed using the ESPhome Run command.Follows is a working .yaml file that allows the camera and it's "flashbulb" to be accessed in Home Assistant:________________#esp32_camera:external_clock:pin: GPIO0frequency: 20MHzi2c_pins:sda: GPIO26scl: GPIO27data_pins: [GPIO5, GPIO18, GPIO19, GPIO21, GPIO36, GPIO39, GPIO34, GPIO35]# the order of the data_pins is significant, don't mix up the ordervsync_pin: GPIO25href_pin: GPIO23pixel_clock_pin: GPIO22power_down_pin: GPIO32resolution: 800x600name: esp_cam02idle_framerate: 0.1fpsoutput:- platform: ledcpin: GPIO4channel: 2 # channel 1 is used for esp32_cameraid: ledlight:- platform: monochromaticoutput: ledname: espcam_02 light#-------------------------------------------Have fun! Considering the price, if one has the application, these cameras are the ticket.
C**B
Poor quality control - doesn't work as advertised
Save your money and get the official AI Thinker version elsewhere.After months of questioning myself I'm giving up on these. I've tried all the troubleshooting steps I can find but these simply do not work as advertised.I've been trying the ESP32CamWebServer Arduino sketch on both modules. Other sketches work on these and I've verified my pinout settings are correct. The web page takes forever to load, and it will only sometimes give me a picture. I even tried boosting the input voltage to 5.2v, which helped the web page to load a little faster, but I am still not able to get the video stream to work. Just a single frame per boot. I'm also getting the "E (489) esp_core_dump_flash: No core dump partition found!" error in the serial monitor.I also noticed that one of the USB-TTL adapters uses a typical 2mA while the other uses about 270mA, and its CH340G chip gets too hot to touch within a minute. I think this is just a bad product.
G**N
They all work
Works as advertised. Good price as of 4/10/2025
S**.
It is has 4 MB installed RAM
you can program them with both Arduino or ESP-IDE VS Code plug-in.
H**H
Difficult to program and quality is poor
This is technical and may help you if you can't get the modules to work. First a review: I like that fact that there is a serial interface to program the ESP32-CAM boards. However, one of the two ESP32-CAM boards is bad. The cameras on the board work as expected since I swapped cameras and they both work on the good board. A spare may come in useful. It's not worth my time debugging the ESP-CAM board. 50% passing/failure is not a good sign. That's why only 3 starts but this is still good value. Both serial (daughter) boards worked and since I have more ESP32-CAM boards they will be useful.Here is the technical part: I had to figure out the programming method. To test out the module the Arduino "CameraWebServer" obtain in the Arduino IDE examples is a good one to try. I use both Arduino IDE and Visual Studio Code and had problems. Eventually found out that the serial board's serial device has RTS connected to the EN, and DTR connected to IO0. In order for the ESP32-CAM to work, both lines must be low or float. The Arduino IDE does not lower these lines after programming and neither does VSCode PlatformIO. A little research says the board connects those pins through a diode but I did not verify that.To get the part to run and still see the IP address of the Camera server (the Serial port prints the IP), you need to use another serial terminal program. I use YAT, which I love, but there are many good ones. After the serial program was configured to the correct serial port, one needs to toggle the RTS and DTR lines low (i.e off). The ESP32 will come alive after that. You can then reset the part using the reset switch on the serial board or toggle the RTS line using the serial terminal program.All this took a long while to figure out and I hope this discussion helps you.
D**F
So convenient!
This board makes it so much more convenient to program the ESP32-CAM. No shorting IO/0 to gnd. No fussing with a FTDI/USB board. Just plug in the ESP32-CAM board and flash away.
TrustPilot
5天前
1 个月前