

✨ Elevate your space with marble magic—DIY luxe made easy! 🏡
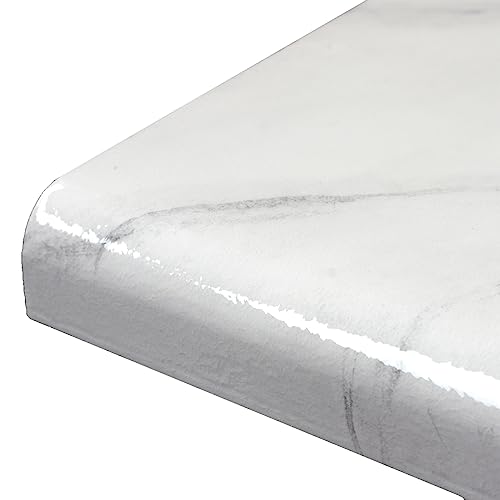
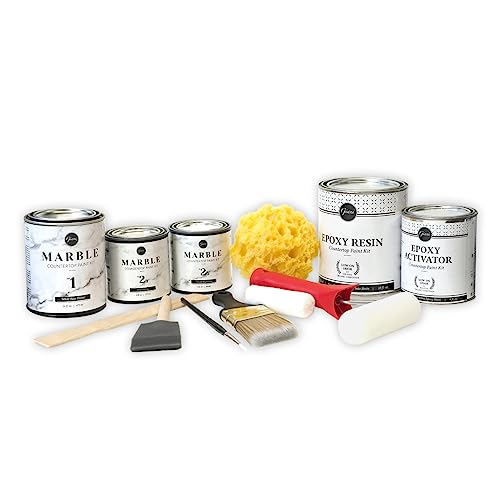
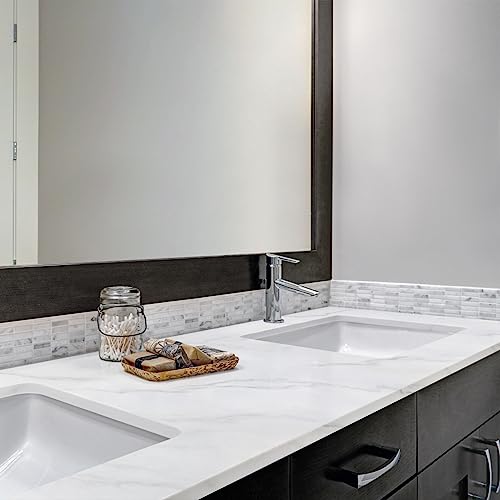
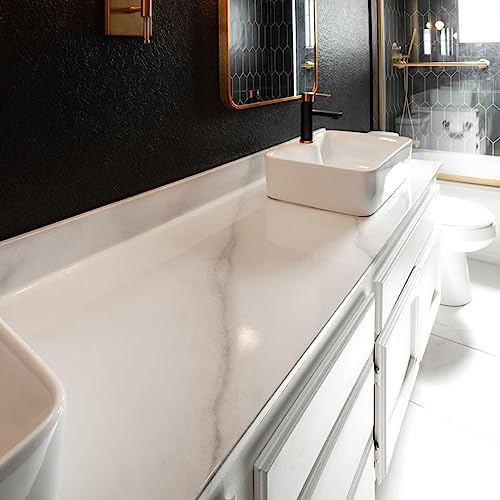
The Giani White Marble Epoxy Countertop Small Project Kit offers a professional-grade, 3-step paint system that transforms small countertops and bathroom vanities with a high-gloss, chip-resistant epoxy finish. Covering 12 square feet, this all-inclusive kit is designed for easy application on laminate, Formica, and other surfaces, delivering the elegant Carrara marble look in just one weekend.


| ASIN | B0BMQKMH9S |
| Batteries Required? | No |
| Best Sellers Rank | #61,536 in Tools & Home Improvement ( See Top 100 in Tools & Home Improvement ) #111 in Interior & Exterior House Paint |
| Brand | Giani |
| Color | Carrara White |
| Color Code | #f3f6f4 |
| Coverage | 12 square feet |
| Customer Reviews | 4.3 4.3 out of 5 stars (157) |
| Date First Available | November 17, 2022 |
| Dry Time In Hours | 48 |
| Finish | High-Gloss |
| Finish Type | High-Gloss |
| Full Cure Time | 48 Hours |
| Global Trade Identification Number | 00850015970504 |
| Included Components | Brush, Sponge Roller, Paint Cups |
| Indoor/Outdoor Usage | Indoor, Outdoor |
| Is Waterproof | True |
| Item Form | Liquid |
| Item Package Quantity | 1 |
| Item Volume | 52 Fluid Ounces |
| Item Weight | 6.8 pounds |
| Item model number | FG-GI WHT MB SPK |
| Manufacturer | Giani, Inc. |
| Package Dimensions | 9.21 x 8.58 x 7.17 inches |
| Package Information | Cup |
| Paint Type | Acrylic |
| Part Number | FG-GI MB SPK |
| Size | 52 Fl Oz (Pack of 1) |
| Special Feature | Chip Resistant |
| Special Features | Chip Resistant |
| Specific Uses For Product | Interior |
| Surface Recommendation | Laminate, Formica |
| Unit Count | 52.0 Fluid Ounces |
| Water Resistance Level | Waterproof |
C**.
We loved this!
Giani Quartz Easy Epoxy is fantastic for small countertop projects! The application is straightforward, and the epoxy goes on smoothly with minimal bubbles. I love how it dries to a durable, glossy finish that really makes surfaces look professional and polished. Perfect for DIYers tackling a small renovation or craft project, and the kit comes with everything you need. Highly recommend for anyone wanting an easy, high-quality epoxy finish without the hassle! I haven’t had any other issues with it so far. The coverage of paint was perfect amount for what we needed and we have had so many compliments on it so far.
L**Y
Giani-Marble look Bathroom counter top
Needed a change in bathroom and did not want to spend a lot of money. I researched this product and watched tutorials. Decided to give it a try. WOW! Price was fantastic and it completely transformed my vanity! You can see my before blue countertop and the after. Easy to apply. Practice the marbling first as the you tube videos walk you through the process. If you do not like the initial marbling you apply, no worries, it’s easy to wipe off and start over. It has brighten the bathroom, paint covered the blue wonderfully well. Had a few bubbles when the top coat was applied but not noticeable. I would definitely recommend if you are looking for an inexpensive solution for updating countertop.
B**K
Really does look like marble!
Here’s a polished version of your review that keeps your authentic voice while making it clear and helpful for others: I really like this countertop painting kit! It was fairly easy to use, and the final result is absolutely gorgeous. The gray veining looks very realistic, and I was especially happy with how mine turned out. The kit comes with most of what you need, which is super convenient. That said, I’d recommend having a few extra supplies on hand: a razor blade to remove caulk, a Brillo pad (or something similar) for cleaning, and some mineral spirits for the epoxy application and cleanup. The epoxy step was a little tricky—especially when it came to drips on the edges—but manageable with some patience. One technique that worked really well for me was using a water bottle to spray and blend the veining. I used the water to blend edges more than the brush. It helped create a smooth, natural look. All in all, I’m very happy with the outcome and would definitely recommend this kit if you’re looking to refresh your countertops on a budget.
A**R
Beautiful countertops at an affordable price
We purchased an older home that had the original countertops from 1967! We didn’t have the energy to do a kitchen renovation, so I decided to give this a try. I figured the worst that could happen was I’d still have ugly countertops. I actually was really impressed with the product. I was nervous doing it and I encourage everyone to practice on the practice square they send. Overall it was pretty easy. My son came to visit and my husband asked him how much he thought we paid for our new countertops. My son said 14k. I laughed and said $169. He couldn’t tell they weren’t quartz until i told him and he got closer. I’m really pleased with how they turned out. The quality is great. The only warning is to be careful of placing scratchy items on it.
S**B
Worth the money
I love this product! I covered my Formica countertops several years ago. Didn’t think it would actually last this long. Counters have lost the super shine but so much better than yellow formica! I painted mine to look like marble, even added some of my own colors and techniques to get the look I wanted. It turned out great! Watched a few videos to learn to paint a marble look. Giani’s top coat is the best. I have tried other less expensive tops coats and they were junk, wouldn’t dry properly etc. I even painted up the wall with Giani to cover Formica!
H**S
Gross and ruined Paint
I started my project and it was going well, but then I opened the grey veining and the paint was completely chunky and hard. Now my entire project is thrown off and I won’t be able to use my bathroom counter for a super long time until I can get a new replacement from the company. NOT ideal.
D**F
Easier Than Expected
I did the research on this kit and watched hours of video and read at least 50 reviews. More interested in the negative ones, I found that most of the negative were probably more about skill levels. I decided I will purchase the mini kit for my bathroom. First, the kit came nicely pack. It included documentation with step by step instructions and pro tips which helped out a lot. I began by removing the faucets and drains then sanded sand the entire sink and countertop down. This is probably the most important step because you want a nice clean surface the product can bond to. I did about 4 coats of the included primer and let dry 30 minutes between coats for perfectly primed surfaces. Next, I took my time and spent about an hour painting on my veins making sure to be as detailed as I can be. I found that doing small portions at a time worked well as to avoid your initial lines from drying. Use the included spray bottle to thin out your veins and the brush to dab and move some of the paint away from the vein. You don’t want any hard line veins because they do look like paint stokes if you do. Just take your time. If you don’t like what you have just paint over it with the primer and try again. As for prepping and applying the epoxy, make sure you mix it for at least 3.5 minutes. It really goes on effortlessly. Pour it on the countertop in 3 lines. Take the provided brush and coat your backsplash in 2 or three strokes. Use the foam roller and spread it out. Push any excess over the edge of your countertop on to your plastic tarp provided. If you have a bowl sink, push it into the bowl and it will drain into hole. Take the provided foam brush and spread it around the bowl until completely covered. This epoxy is self leveling so it smoothers itself out. They want you to complete this process in 30 minutes. I chose to time myself and have it done in 15. This SEO was super easy. I found that the most work was prepping and sanding. Most tedious step was creating the veins. If you’re a creative person this kit is for you. It doesn’t take too much skill to apply this kit but it helps a lot. Good luck!
E**N
My two countertops were a total of 7 feet. This kit had more than enough product to do the job. One problem we had was that the black primer must have partially froze during shipping and had lumps. We let it sit for a day, but it did not smooth out, so we used it anyway. By flatting and spreading the lumps most were gone. Once dried we used sandpaper to get rid of any lumps. We added a second coat, and let it dry. For the rest of the process we followed instructions. About 30 min after applying Epoxy, use a light to find small bubbles, or uneven areas and using a sharp knife spread and even add a drop of epoxy. Also after about an hour, take a wooden stir stick and run along the under edges of countertop to remove drips. Check again later. Very happy with finished job.
TrustPilot
5天前
4天前