✨ Hang it, love it, flaunt it! ✨
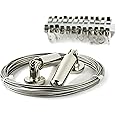
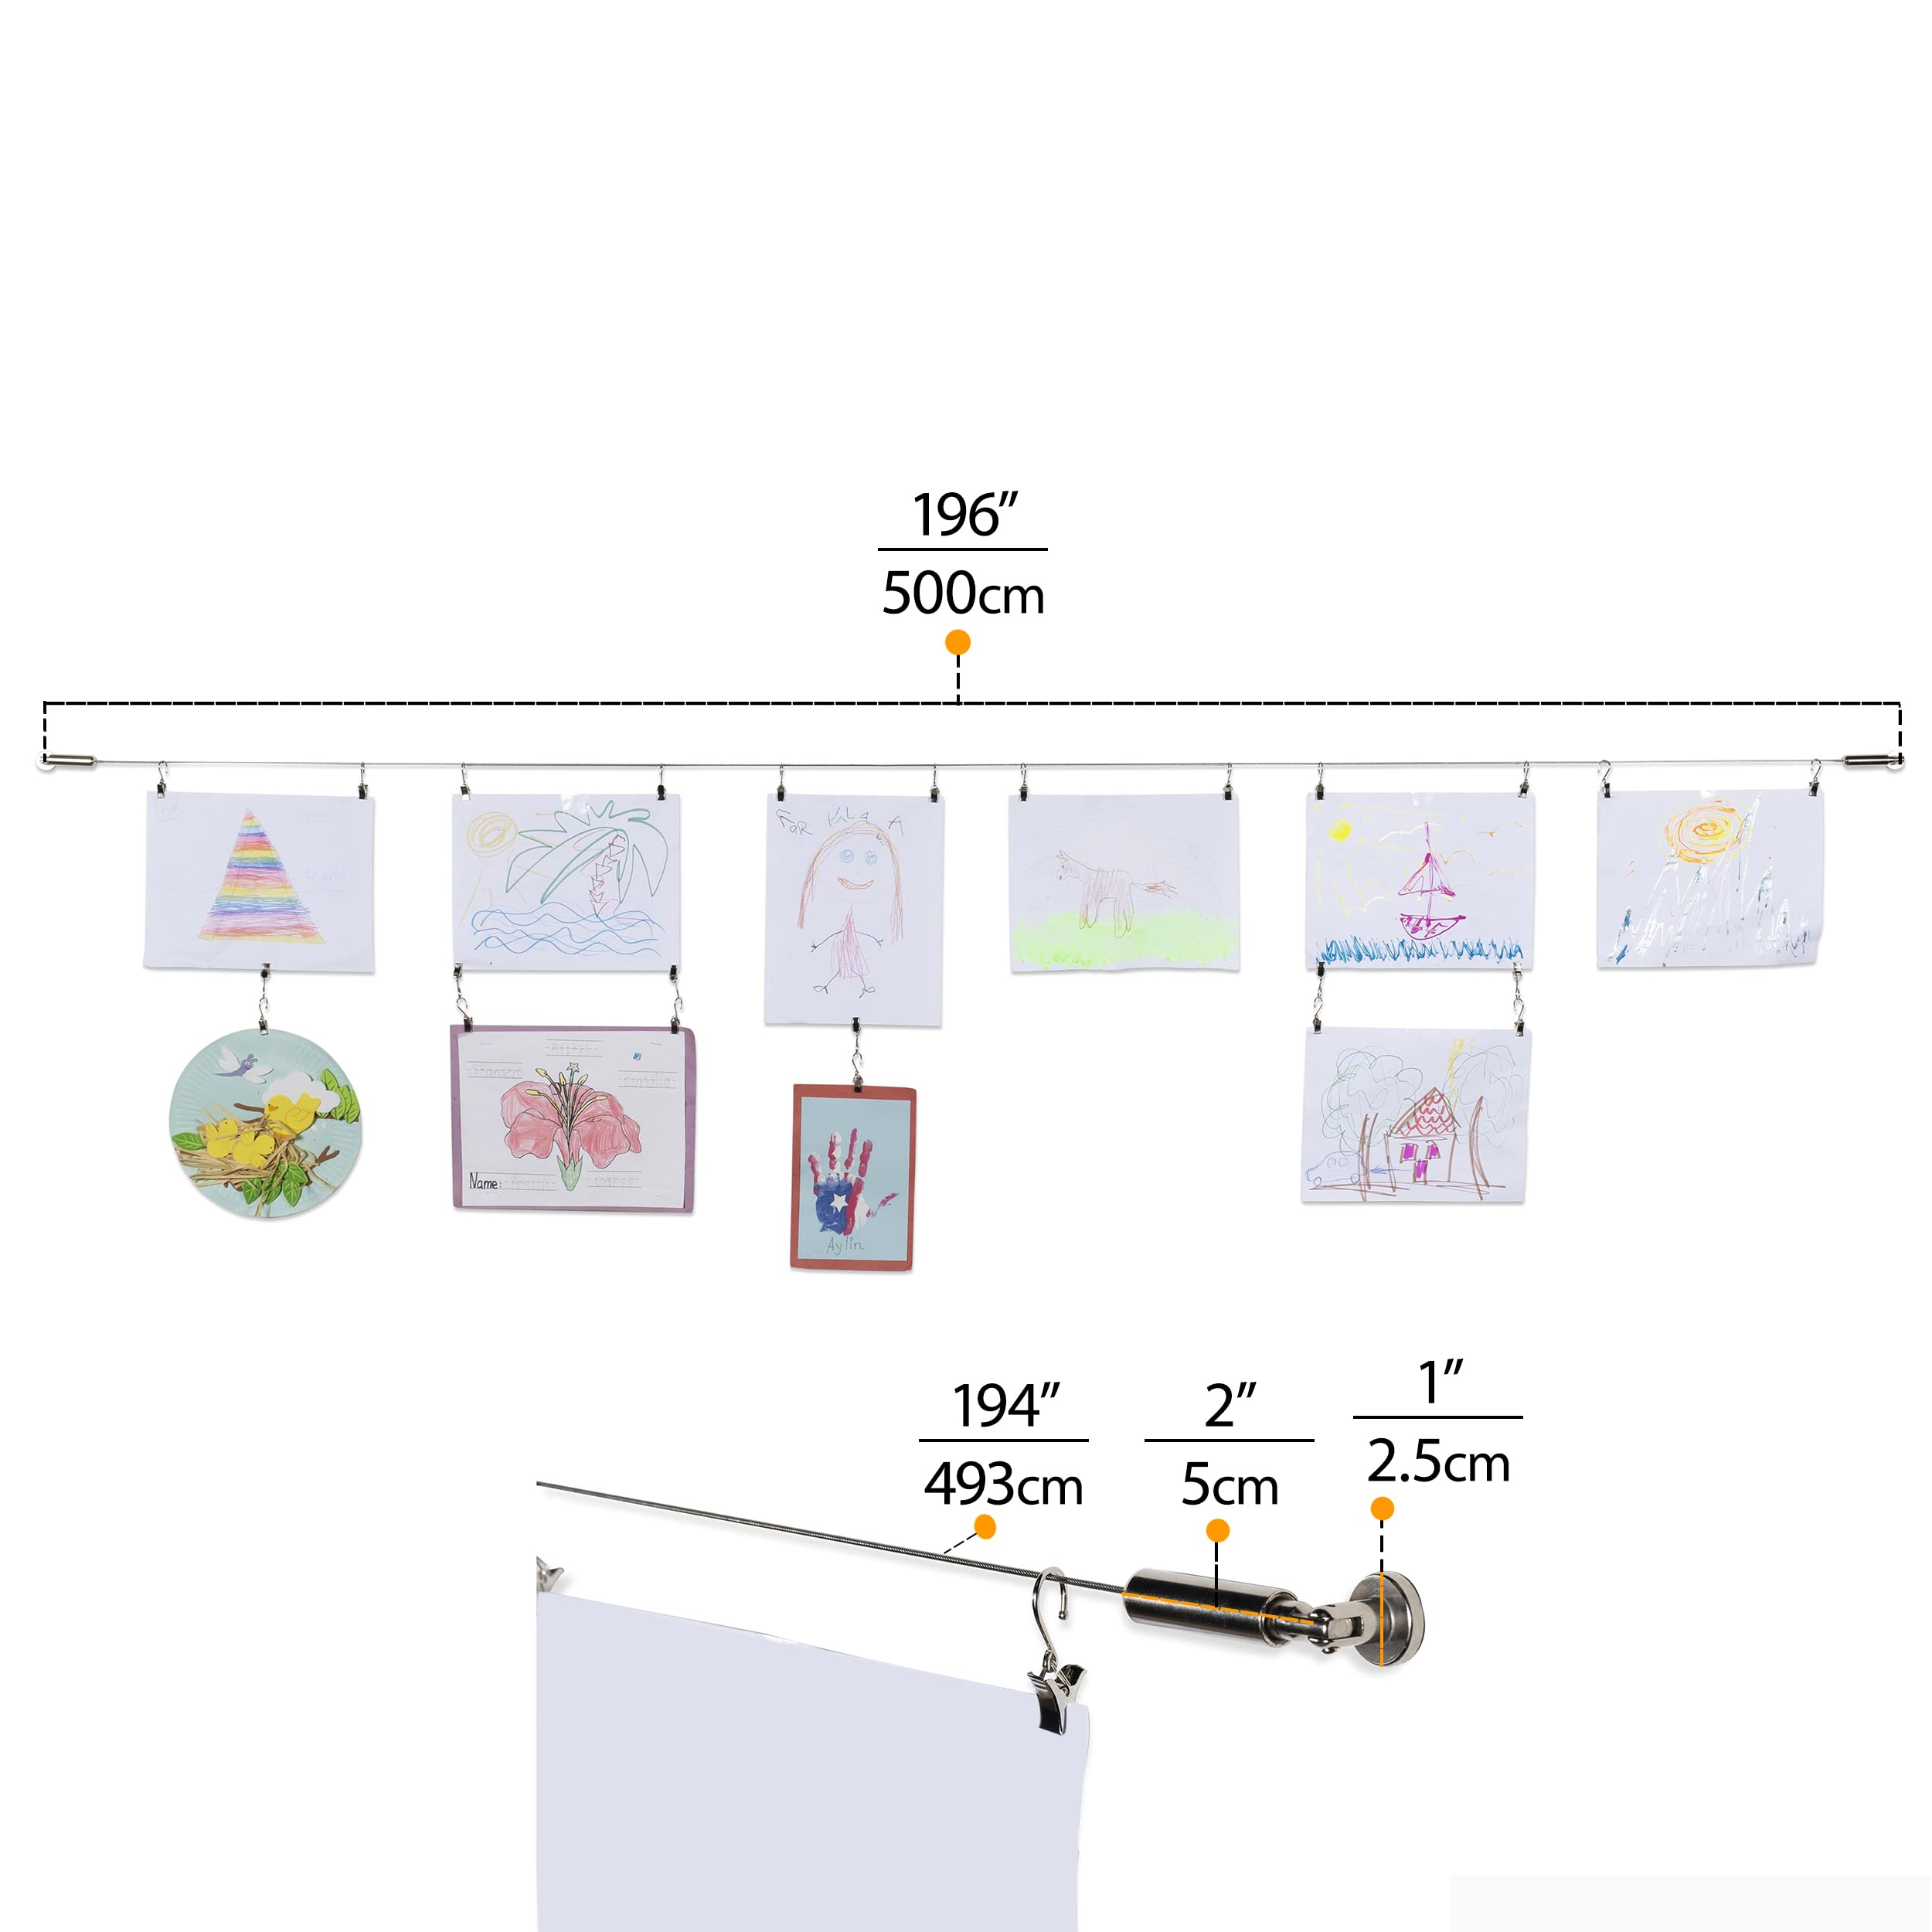
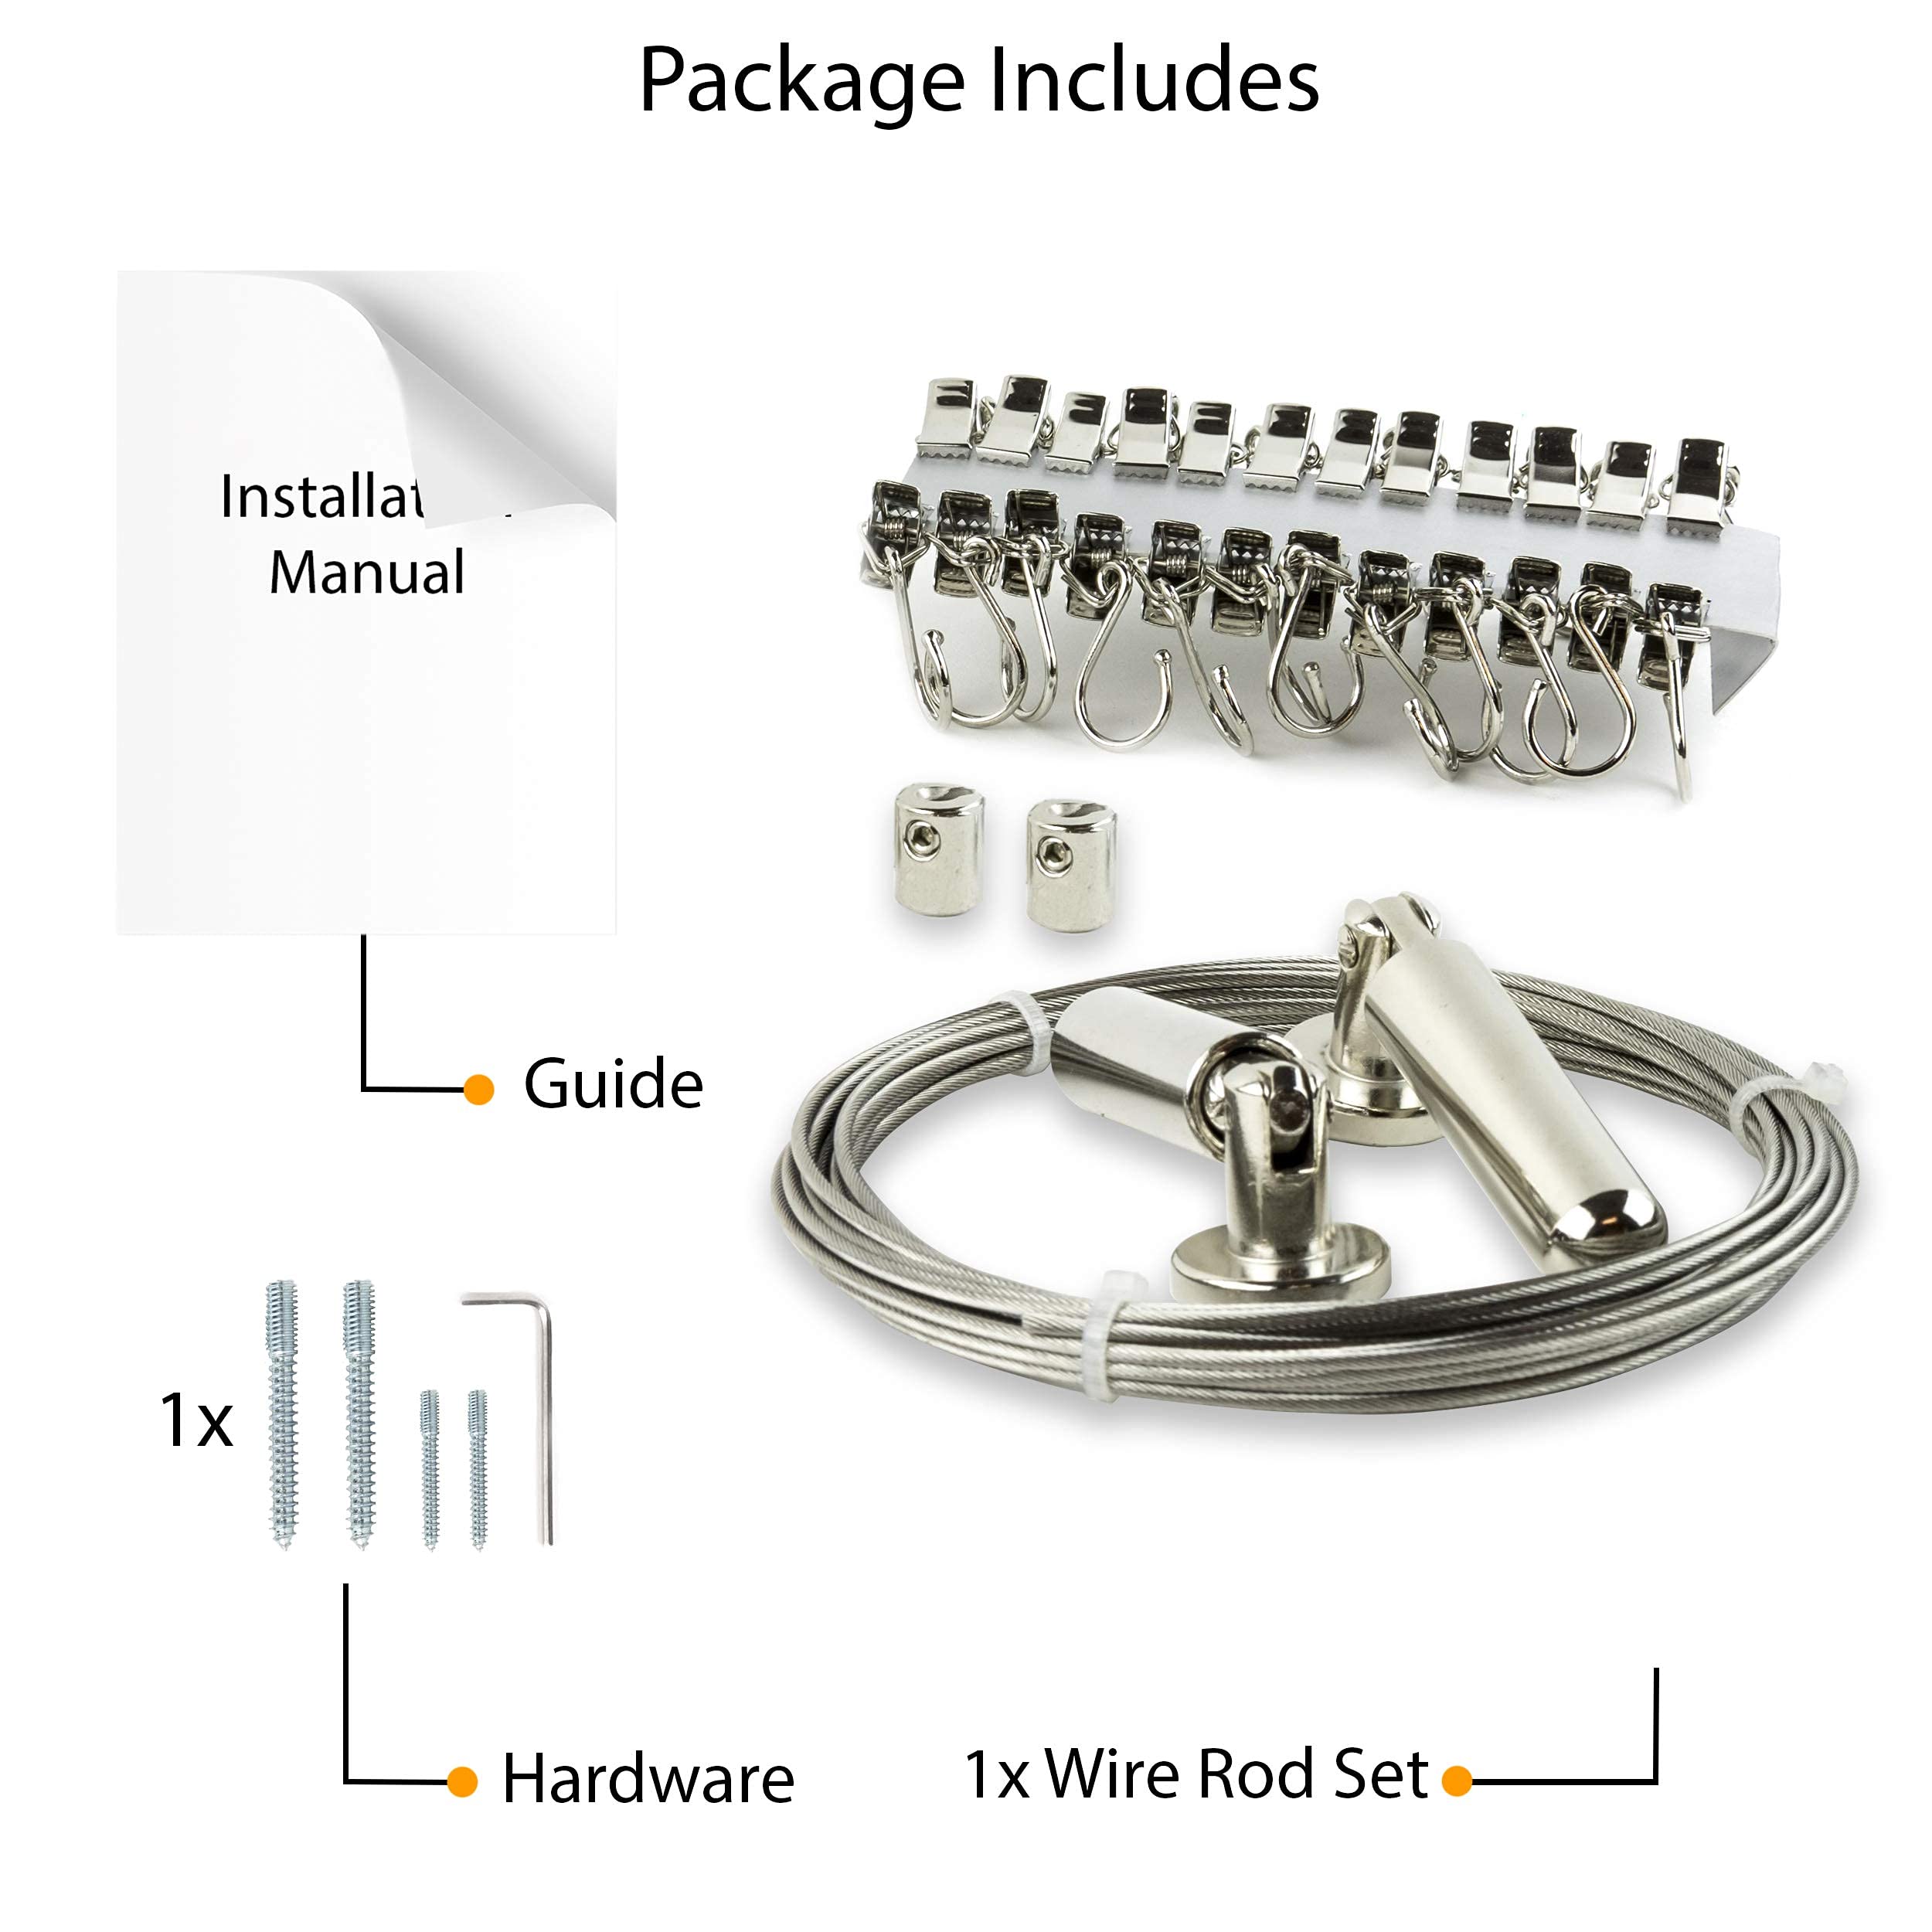
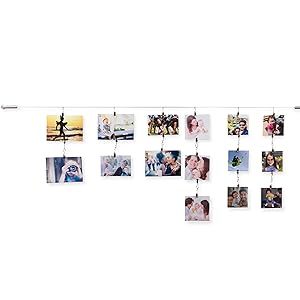
The Wallniture Curtain Rod Set is a versatile and stylish solution for hanging curtains and displaying art. With a length of 196 inches, it can be easily adjusted to fit various spaces. Made from durable stainless steel, this rod supports up to 10 pounds and comes with all necessary mounting hardware for quick installation. Perfect for modern homes, it seamlessly blends with farmhouse, rustic, or boho decor.


| Brand | Wallniture |
| Color | Silver |
| Product Dimensions | 8"L x 7"W |
| Material | Stainless Steel |
| Mounting Type | Wall Mounted |
| Item Weight | 0.79 Pounds |
| Maximum Weight Recommendation | 10 Pounds |
| Manufacturer | Wallniture |
| UPC | 885462992199 885399619404 608939769014 |
| Part Number | 1 |
| Item Weight | 12.6 ounces |
| Country of Origin | China |
| Item model number | 1 |
| Is Discontinued By Manufacturer | No |
| Finish | silver |
| Item Package Quantity | 1 |
| Batteries Included? | No |
| Batteries Required? | No |
L**N
Good Solution for Room Divider
This was fairly easy to install, although it took some time to figure out the instructions (as usual with almost anything). I used the video more than the printed instructions. Both are very minimal and would be better with some details. No problems, though, and it seems sturdy — so far. I was lucky to have solid wood to screw it into; it's an old house (late 1800s) turned into apartments, so there's nothing like studs 16" inches apart.It was a little tough to get the wire into the 2nd thing (after the first one was in and I stretched it out — Part B into Part A, I think) after I put the curtains on the wire due to the weight, but it worked out. No complaints! It's just what I wanted. I'm sure I'd buy another one if I needed it. (It's only been up for a couple of hours, so who knows. But I think it will be fine.) PS I would like to add that it's really not that complicated. I've read a couple other reviews... I didn't even use a drill. I used a skinny screw and a screwdriver to make the pilot hole. If you're not handy, sure, it might be difficult. But if you have basic skills, insulation is pretty easy And it's still holding up! Glad I got it.
M**C
Very strong and looks great!
I bought one of these to test out hanging some sheer drapes across a span of 3-4 windows. I didn't want big bulky hardware, and didn't want a lot of sag in the wire. I ended up not using the clips and just ran the wire through the drape loops. I was so impressed with the build quality, strength and clean look, I happily bought two more to finish off the room. The drapes slide open/closed easily, even without the clips. Easy installation if you are at all handy.
A**R
Good but wouldn’t recommend for anything other than artwork
Fairly easy to install. Since I’m only hanging a small area of artwork this solution worked for me. As others have mentioned the anchors were so big I just used the drywall screws without the anchors. I would have loved to use the wood screws that were included but they did not fit into the wall mount pieces. Felt this was a little pricey for what it is, but after tons of reading reviews of other options on amazon went with this one. I like that it included the hooks for hanging the artwork.
J**D
Very strong cable, beware
I got this to hang a tapestry.Very good product. Other tools are needed (cable cutters,drill,stud finder,level)but easy to put up in my opinion. Comes with hooked clips for hanging and an abundance of cable so length won't be an issue.The cable is very strong, so if you don't have quality cable cutters it will fray when you try and cut it to length. I have a heavy duty sheet steel snipper that can cut solid steel thicker than this cable and I barely managed to so its no joke strong.As long as its mounted in a stud its very sturdy, the cable included is a generous length, and its parts and clips are all metal and high quality
W**E
READ THIS - there are instructions!
I wish I could give 2 ratings - one for how it looks (five stars), one for the installation process (one star).I bought two of these to display my three-year-old's artwork. They look amazing and I'm so glad I bought them. But the instructions were lousy. I've always been a really handy woman but if I had tackled this project a few years ago (before I had a job where I use tools everyday), I would have really screwed it up and called my dad to bail me out.First - you will need a drill, an assortment of bits, and a stud sensor. The kit comes with those plastic wall anchors, but given the tension required to hold the wire up plus the weight of whatever you're hanging, it seems essential to find a stud. I think it'd be a disaster to use those stupid wall anchors.Second, you will need a tape measure and level. I was lucky enough to borrow my dad's laser level but I bet I could have figured it out the old fashioned way, too.Third, you will need a pair of good wire cutters. I used some small ones I own to cut necklace wire and it didn't work well at all. If I had been doing the job at a decent hour, I would have borrowed some regular wire cutters from the neighbor. My hand is sore from using those small cutters and I think I probably ruined them for future use.I'm using these to display artwork, but my instructions should work if you're hanging curtains, too.So, after you've marked your studs and made sure your holes will be level, drill a pilot hole for the screws that go into the wall. (I would have remembered what size bit I used, but I honestly didn't think I'd be drafting an instruction manual) All the parts use the same tiny allen wrench, including these. This is a really poor design flaw, because it's really easy to strip the screw and mess up the cheapo allen wrench. Had I not bought two of these, I would have been temporarily defeated at this point - I was able to open the other package and use the second allen wrench for the rest of the job.So, just completely omit the allen wrench for this part. You can fully attach the next fastener (the one that bends at a 90 degree angle) to the screw and then use it as a lever to twist it into the wall. Be very careful with this part - I was anxious the whole time because I was sure I would strip the 90 degree fastener too. Luckily, it worked as I had already stripped the allen-head on the screws.Measure the distance between the holes you drilled and cut your wire. ***Include SEVERAL inches of extra wire - it's easier to cut if it's too long than it is to go out and buy new wire.Next, you'll put the part that looks like a bullet on the wire, with the threads facing the end. I had to go through the hole with a drill bit because there was debris in the hole and the wire wouldn't fit.Take the small part with two allen-head set-screws, loosen the screws and place it over the wire. Tighten the set-screws, leaving yourself 1/2-1 inch wire sticking out the end. Now align the end of the wire with the 90 degree fastener (attached to the wall) and screw the bullet on (sandwiching the small part surrounding the wire between the fasteners). You will be tempted to screw the bullet all the way in - don't. Attach it until it just covers the threads - you'll have time to adjust the tension later.Do the same thing with the other end - remember to put the bullet on the wire first. At this point unless you are really lucky, you'll have to move the fastener with the set-screw up and down your wire until the tension is where you want it. You may even have to trim your wire. If you've cut your wire too short, remember you have 1/2-1 inch extra on the other side and you can use it if it will help. Once you've got the right length, adjust the bullets so they hold a nice tension on the wire and the fasteners look even.If you're like me, you'll have spare parts. The plastic wall anchors (you'd be nuts to use), and two little fasteners with one set-screw in them. If you are using this for curtains, these fit over the wire to stop the hooks from sliding onto the end brackets. They clip onto the wire and you tighten the set screw where you want them.I hope this helps you! Start to finish, with a few Oreo breaks, it took me about an hour and fifteen minutes to install 2.Good luck!
H**V
Long and relatively strong
UDATE- the heavy curtains I got accidentally tugged and the wire snapped. Be warned!!.......................Original review: This curtain wire does just the trick. First, it's easy to assemble - just make sure you measure twice so it's not slanted. Also it's long. I cut mine at about 120" and there was tons of slack. I'm using it as a room divider and it's holding up moderately heavy curtains easily. I didn't use the hooks because my curtain is grommeted, but they appear to be reasonably durable for light use.
T**E
Great for kids art
I've been looking for something to display my child's art on the wall with flexibility for different sizes. This is perfect. The wire can be cut to adjust it down to your custom size.
TrustPilot
2 个月前
1天前