Deliver to Taiwan
IFor best experience Get the App
🏊 Dive into Cleanliness with Style!
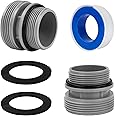
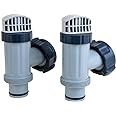
The Hayward SP1091LX Dyna-Skim Above-Ground Pool Skimmer is engineered for efficiency and durability, featuring a large debris collection basket, UV resistant construction, and versatile compatibility with wide top seat pools. Its user-friendly design ensures effortless maintenance, making it an essential tool for any pool owner.
Item Dimensions L x W | 12.75"L x 10.25"W |
Item Weight | 4.75 Pounds |
Size | Normal |
Closure Type | Snap |
Additional Features | UV Resistant |
Pattern | Solid |
Shape | Round |
Style | Custom |
Color | multi-colored |
Material Type | ABS |
B**S
small but powerful
I had a double wide skimmer on the above ground pool for years, but read how the smaller openings are closer to the water and pull more bugs, etc off the water and they were right.This thing was easy to install, I did cut the opening in the steel and covered the older opening. Works great , no leaks so much cleaner pool now
C**A
Perfect for an above ground pool
Def happy with this skimmer. I was a little skeptical cutting into the pool but installing was much easier than expected. Works amazing! Def worth the money. No instructions included, pretty self explanatory. There’s 2 sets of screws that come in, make sure you put them in the correct slots.
H**R
Installed skimmer onto Intex 22'x52" Ultra Frame Pool
Like many of you, I bought this skimmer to attach it to my Intex pool that did not come with one from the manufacturer. I have an Intex 22'x52" Ultra-Frame pool that I had recently upgraded with an Intex sand filter and pump with salt water ECO system combo from the lousy cartridge filter pump that came with the pool. I searched all through the reviews and questions asked on this product, many YouTube videos, and Google searches to determine the best way to install this skimmer. This Hayward skimmer is very durable and looks great. It comes with a filter-basket, hardware, gasket, and everything needed to install to your pool. A lot of the reviews on here said to cut the butterfly gasket into two pieces, install your skimmer onto your liner, then cut out the liner at the opening of the skimmer. I did the opposite, by taking the skimmer inlet faceplate and tracing around the inside of the inlet and also the screw holes. I then used a punch and poked through the liner where the screws should go. With my water level below the bottom of my inlet outline, I used a box cutter and slowly cut out the liner around my inlet outline I had marked earlier. Now I was able to install the gasket around both sides of my liner like it was intended. I then poked my screws through the inlet faceplate and the gasket and screwed them down tight into the skimmer body. No trimming of the screws was necessary and everything bolted together tight without a single leak. I didn't want to hard plumb the skimmer to my pump, and thanks to my new sand filter pump I had two extra Intex hoses laying around that I wanted to try to use to make the plumbing look as clean and factory as possible. Intex hose end fittings are 40mm and aren't your typical pump fitting size (1 1/2"), so I went to Lowe's and got everything I could find to make this work. I wanted to be able to still use the two inlet ports on the pool as well as the skimmer and I wanted to be able to shut off flow to the skimmer also. To do this I needed a ballcock to install onto the skimmer and a tee fitting to bring the skimmer hose and the original inlet hose together at the pump inlet. I found a 3" long double threaded pipe with 1 1/2" threads that threaded right into the bottom of the skimmer body. I wrapped both ends of the pipe in PTFE tape to minimize leaks, then installed the ballcock (1 1/2" threads as well) onto the pipe. I was able to find some special adapter fittings on Amazon that allows you to attach an Intex 40mm hose onto a 1 1/2" standard fitting. These are made by GAME and come in a pack of two. I bought two packs and installed one of the fittings into the ballcock and attached my extra Intex hose onto this fitting using the supplied gasket. I installed two more of the special adapter fittings onto my 1 1/2" tee fitting and installed the other end of my skimmer hose onto one side of the tee with a gasket, then attached my original inlet hose to the other end of the tee using a gasket as well. Since I didn't have anything to attach two of the Intex 40mm fittings together at the pump inlet and my other end of the tee, I decided to use the slide-on hose fitting that came with the skimmer and attached it to the middle tee fitting. I took a box cutter and cut the end off of one of my extra Intex hoses and jammed it down tight onto the Hayward slide-on fitting and put a nice bead of silicone RTV sealant around the outside and inside edge where the hose end meets up with the Hayward fitting. Let that sit and dry for an hour, then connected my tee with my two new skimmer and original inlet hoses to my sand filter pump. I wrapped several layers of PTFE tape around all threads before connecting any hoses and so far no leaks! Hopefully this will help someone in the future who wants to add one of these nice skimmers to their pools.
E**J
It's a Hayward for goodness sake
I wanted to write this and add some more information onto some of the other reviews hoping to help others who may be considering this product.First of all, this is a Hayward product. They don't have an impeccable reputation for no reason. The skimmer is solidly built, the door has a clever retaining design making it easy to install/remove from either the inside or the outside of the skimmer, and it comes with the return nozzle and all the fittings you will need for 1 1/2" flexible lines. (Well... except for the hose clamps) The basket is plastic, as they always are, but this one seems substantial and I expect it will take a considerable amount of "empty the basket beatings" before I have to worry about looking for a replacement.As for the specifics of my install... I installed this on a 12' metal-frame Intex pool. (See my customer shot above) Other reviews mentioned this working on similar pools so I tool the chance figuring it would be close. I'm really glad I did. The Hayward was about 3/4" of an inch taller than the crappy Intex skimmer that the pool came with. I simply took the gasket and traced the inside on the pool liner after removing the Intex skimmer. A utility blade made a nice, clean cut taking about 1/2" off the top and the bottom of the opening. I used a drill bit to create holes for the mounting screws as they (of course) didn't line up with what was there.The Hayward skimmer comes with a single, silicon u-channel gasket that fits inside the opening and completely seals it against the skimmer and the face plate. I really like this design because there is no way water is going to leak like you could get when a two-piece foam gasket starts to break down. Assembly was straight forward and except for ruining a socket wrench because I used it underwater on the lower screws, everything went together very easily and was very solid when assembled.The original Intex skimmer had a stand-off on the lower part that kept the skimmer from torquing under it's own weight. The Hayward doesn't have this but it may be something to consider adding. With the pool full, the liner is pushed out and keeps the skimmer upright so I don't think the kick-stand is required in this case but if you drain the pool for the winter, the skimmer may dip and strain the mounts without something to support it. Would this cause problems? Probably not but I don't see a reason to strain the liner if I don't have to. In my case, I used the hose as a means to support it but a block of wood or a piece of PVC would probably do the trick as well.The return nozzle is standard Hayward design. There is a retainer ring with rubber gaskets that sandwiches the liner. Again, on the Intex pool I had to open the hole just a hair (maybe an 1/8" on the bottom) to get the nozzle to comfortably fit. There is a retaining ring on the pool side and an adjustable nozzle that allows you to direct the stream based on your pool configuration. The included hose adapter would position the hose in-line with the nozzle which, in my case, would make it stick out from the side of the pool. I simple got a 1 1/2" threaded PVC adapter and a right-angle to orient the hose vertically. Since everything is standard 1 1/2" it worked great.The last thing I wanted to mention is the vacuum plate. At first glance I was disappointed because the nozzle on it looks to be 1 1/4" and I have a 1 1/2" vac hose. However, on further inspection it is actually a stepped design with accepts both size hoses! Ingenious! I'm happy to say that it works perfect with my 1 1/2" vac hose (with rotating end) giving a nice, snug fit. With a sufficient pump behind the setup, it works amazing.Overall, this is a great product. I'm extremely happy I bought this and I'm super pleased that it works so well with my Intex pool. This was one part of my "sand filter upgrade" that I made to the Intex pool this year and I'm so happy about all of it that I could dance.
D**E
Works great !
It works great and is stable , nice size to work with and looks nice , the color is white , easy to clean out . I was missing a screw , so had to go buy another because we had water in it and couldn’t wait for a replacement to be sent ..
TrustPilot
2 周前
1天前