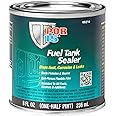
🛢️ Seal the deal, stop the rust, fuel your freedom!
POR-15 Fuel Tank Sealer is a professional-grade, 8-ounce liquid sealant designed to stop rust, corrosion, and leaks inside metal fuel tanks. Resistant to all fuels, alcohols, and additives, it forms a durable, non-porous barrier that extends tank life and ensures reliable performance.


| Material | Plastic |
| Brand | POR-15 |
| Item Weight | 0.01 Ounces |
| Item dimensions L x W x H | 2.8 x 2.8 x 3 inches |
| Water Resistance Level | Water Resistant |
| Item Form | Liquid |
| UPC | 038514492165 680336041030 051491492164 |
| Unit Count | 8.0 Ounce |
| Global Trade Identification Number | 00051491492164 |
| Number of Items | 1 |
| Color | Silver |
| Surface Recommendation | Metal |
| Manufacturer | POR-15 |
| Model | 49216 |
| Item Weight | 0.01 ounces |
| Product Dimensions | 2.8 x 2.8 x 3 inches |
| Item model number | 49216 |
| Is Discontinued By Manufacturer | No |
| Manufacturer Part Number | 49216 |
| OEM Part Number | Not Regulated |
A**R
The stuff is the real deal.
I used this on my Honda 125M 3 wheeler gas tank. I read a lot of reviews and decided this was my best option. This tank was rusted badly on the inside. I used Evapo Rust to clean the tank and it took 10 days and the results were awesome. The tank did develop a few very, very, very small minor leaks (the rust removal of the seams at the lower of the tank caused this) half way through the cleaning process. Don’t worry about the flash rust, it actually helps the POR 15 stick to it better. Take your time and make sure the tank is 100%completely dry, if it isn’t your wasting your time. I waited 5 days. This stuff will stain and get all over so be careful. I put painters masking tape all over the tank to protect it which also plugged the small holes where it was leaking ( they were so small and I couldn’t exactly tell where it was leaking from). If your going to do it right it’s a minimum 3 hour process. Add a few table spoons of POR 15 and start moving it around. Tip it upside down, wait 15 minutes, then tip it to its side, then the other. It’s a painstaking slow process. When it’s acting like you need more add another table spoon. It doesn’t take much. I ordered a 8 oz can and maybe used 3 oz. the directions on the can are the minimum directions. Be sure to look online and get the full installation manual . After I did mine I wanted to add more but didn’t want to put to much in. Afterwards I found the additional instructions online and I would of added more POR15 after the 3 hour process when it was still tacky. Regardless, it’s been 4 months and it looks like a brand new tank on the inside and there’s no leaks. The stuff is the real deal if you follow the directions and take your time. Please also consider I did my tank in February with very low humidity. Evapo Rust is also awesome. Well worth the money and buy enough to fill you tank completely, will definitely speed up the process. Unfortunately I didn’t take a before pictures. The 2nd picture is after the cleaning and you can see the flash rust.
-**E
BEST Tank Sealer
POR15 products need no introducing .This can easily did my 2 gallon Motocycle tank, you'll need to strip and fully de rust the tank first or IT WON'T WORK .Needs serious mixing, the bottom of the can was the separated out part, I tried shaking it a while to no avail so I used an old CLEAN large flat bladed screwdriver to slowly turn and turn it until the colors were fully mixed, takes a goodly long while .Once opened the stuff needs to be used soon so DO NOT OPEN THE CAN UNTIL THE TANK IS DE RUSTED AND YOU'RE READY .I used a medium sized plastic funnel to pour it in then I capped the tank and began rotating it to ensure the mix flows into every corner and crevice ~ this is not a job you can rush .After making sure it had fully coated the inside of the tank I cleaned up the stirring screwdriver and funnel, it's easy to do if the stuff is still wet, once it dries it's *PERMANENT* so watch there you're working as it WILL NOT COME OFF EVER . floor, driveway, clothes, etc. .if the tank you're working on has any pinholes, be sure to tape them up first, this stuff is amazing and plugs BB sized pin holes easily .Don't forget to follow the instructions to the letter and remember to keep tuning and tipping the tank so the mix covers all crevices and the inside of the top too .I polish then wax the tank first so any droplets I might spill are easy to wipe off right away .I also tape around the filler neck with blue painter's tape because I'm extra cautious .I used this product in a 'Hail Mary' to save a 40 year old badly rusted and leaky Motocycle tank, I hope in time I'll find another but fr now it works fine, the ethanol laced fuel doesn't seem to bother it .I imagine I could have done up to a 5 gallon tank .-Nate
R**D
Follow directions carefully and you’ll be fine!!
GodsendI’m working on a 55 year old Honda motorcycle and after de-rusting the gas tank it developed pin holes in the seams. I thought I’d be in a real bind trying to find a new tank, but instead used this, and so far it’s worked like a charm. No more leaks! Just make certain to follow the directions. The tank must be very clean and rust must be removed. I removed the rust by keeping vinegar in the tank for two days and then draining it and neutralizing with two rounds of warm water and baking soda, after which I flushed it thoroughly with a mixture of Dawn detergent followed by four or five rounds of clear water flush. Then IMPORTANTLY the tank was immediately dried with a heat gun, as not doing so runs the risk of flash-rusting, which can happen in only minutes. After the tank was completely dry, I followed the instructions very closely on the can of Por 15 sealer and now NO MORE LEAKS! I couldn’t be happier!!
K**R
decent
I guess it works fine if you use it right. I was told this was good up to a 6 gallon tank. That’s a lie. Now I’m stuck having to remove it all and redo it. Make sure you buy enough for your project.
G**G
Amazed
Very good product. This product made my motorcycle fuel tank like new. Very good liner and sealer.