
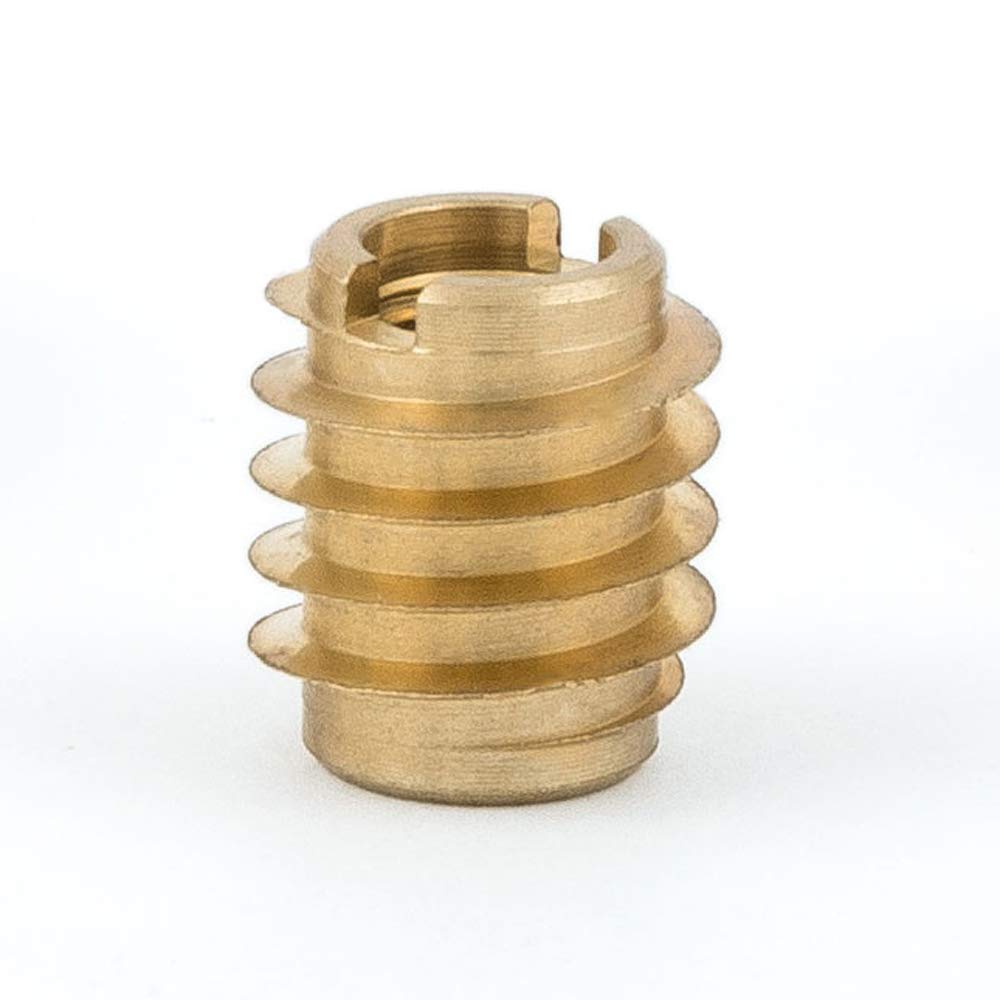
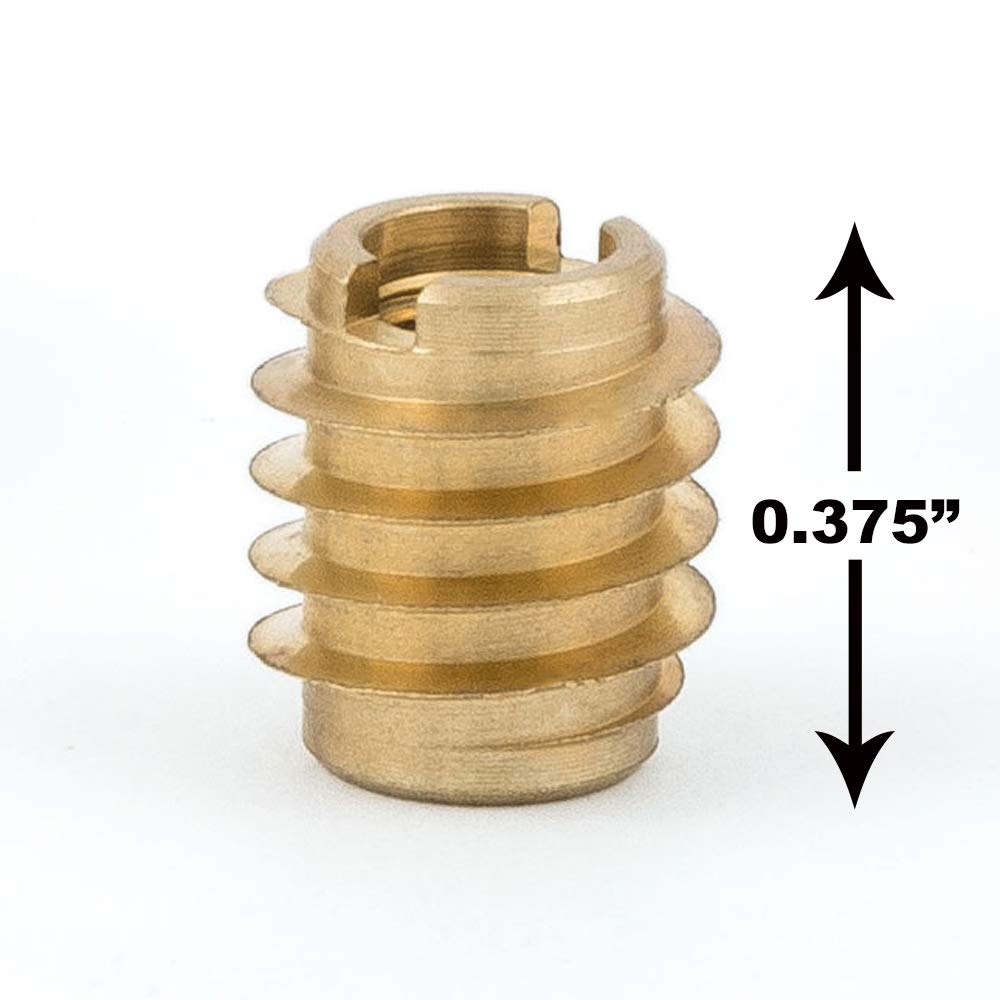
E-Z LOK Knife Threaded Insert for Hard-Wood, Brass Thread Inserts 4-40 Internal Threads, 0.375" Length (Pack of 25)
K**Y
Not Exactly "E-Z" Unless You Are a Pro, But Excellent Results
I am VERY satisfied by these inserts, but I would not call them easy - at least for a novice, hobbyist woodworker like myself. Here's what I learned from installing about 3 dozen of them. This is why I am giving them a 4 instead of a 5. My satisfaction with the end result is definitely a 5.First, get the associated E-Z Lok drive tool (https://www.amazon.com/gp/product/B002091LQG/ref=oh_aui_search_detailpage?ie=UTF8&psc=1) - it makes installation SO much simpler. You might want to file down the outside of the drive tabs a few thousands, because they are larger than the hole and will mar up the wood in you try to drive the insert flush with the wood surface.The nominal diameter of these guys is 3/8", but that makes for a very tight fit. I went to a 10 mm Forstner bit and things got much better - it is still a tight fit but manageable.A generous application of screw wax in the hole significantly eases the insertion. There is a lot of friction otherwise.It is VERY easy to get these things in just off of square, which means that your bolt thread will not start properly. I ended up making a jig out of an old piece of 2x4 to get them started straight. See the photos - sorry if they are different sizes (technical difficulties).Last, and obviously, alignment is critical. If you are more than about a millimeter off, they are not going to mesh at all, or you will get some wonky results, depending on your materials. Fortunately re-mounting is easy. Remove the insert, cut a piece of 3/8" wooden dowel, glue it in the hole, and re-drill.
D**K
Difficult to install correctly, practice on scrap boards!
The most important outcome was that I was able drive 28 brass EZ-LOC inserts into 3/4" red oak boards for a garden bench. Doing so for the first time, it was VERY difficult to come up with a technique thata) drives the inserts straight,b) does not lift the wood around the insert, andc) allows the insert to stay in the board when the installer tool is removed.I practiced on scrap and I wasted more than a dozen inserts, before I felt confident enough to move to the real boards. Tools I used:a) Hand held drill (if you have and can use a drill press for your board size, it is a big plus)b) DEWALT DW1720 Drill Bit Set, Brad Point (works with hard wood only)c) WL Fuller 3/8" drill stop (not needed for a drill press)e) Dowl-it 1000 Self-centering Doweling Jig (or another contraption to keep the insert at 90 degrees)f) DCT T-Wrench for 1/4"-20 Inserts (or another way to drive the insert)The technique I will detail in a moment is valid for hardwood - red oak in my case. I have not tested it with softwood (pine), but I am quite sure that it will need to be modified for softwood (for example, drill bits with sharp brad point are designed for hardwood, and will tear softwood fibers rather that cut them).Additionally, I realize that this technique involves the tools that I already have. For example, you may want to substitute Dowl-it 1000 Self-centering Jig with something else, since I did not use it neither for the dowels, nor to find centers of anything. I only used it to keep the T-wrench at 90 degrees to the oak board. It worked fantastically for that, though. If you have a drill press, you might be able to put a 1/4" bolt in the chuck and turn the chuck by hand to drive the insert: I saw someone doing this on youtube, but I do not own a drill press and could not do that. Whatever you do, you need something to keep a 90 degree angle.This is my technique:a) Take 1/2" brad point drill bit and drill between 1/32 - 1/16" in depth. You do not need a drill stop for that, you will be able to see it. This is the magic step to prevent the wood from lifting later on when the insert is screwed in the wood.b) Take 3/8" brad point drill bit with drill stop attached and drill the rest of the hole.c) Prepare your contraption for driving the inserts at 90 degrees. For me, this was done by attaching my Dowel-it jig to a scrap piece of wood, putting the shaft of the T-wrench through 5/16" inch hole in the doweling jig (I had to sand the shaft a little for it to to rotate freely), and attaching 1/4" insert to the end of the T-wrench.d) Drive the insert half a turn into the wood to establish precise jig locatione) Clamp the jig to the boardf) Rotate the T-wrench (may need pliers) until the insert is driven in.g) Unscrew the T-wrench, remove the jig, check if insert is driven all the way. If necessary, give it another twist.I know this is complicated, but this technique gave me repeatable results. Also note that the drill bit diameter I used was 3/8", NOT 25/64" recommended in the instructions. This guaranteed good looking threads and I did not have an issue of an insert coming out from the wood when the T-wrench is reversed/removed.
B**L
Works great, but some knowledge of materials needed.
I bought a couple packs of these because I wanted a quality insert in which I could mount some leveling feet for some lamps.The wood was to be light oak (hard). I first went through the route of using their insertion tool with a variable speed drill. That didn't work so well and you can see by the last picture. The hole was as recommended (25/64) but the wood turned out to be too hard and it is near impossible to keep the action perpendicular. This resulted in angled insertion and a good bit of slips (scalloping) on the machined slots.I then decided I needed a drill press (just for the perpendicular action and a means to keep pressure on it while turning). I also added some pure silicon to the insert threads before inserting. In the end, I got what I really needed and like the job very much. Just check the softness/hardness of the wood, use something that can keep the action perpendicular and it will turn out fine. (I hand turned the drill press pulley - no electronic motion).
J**N
Go slow!!!
Over all the product works.I had made a few custom tap handles for my keezer and needed theaded inserts to attach them to my tap faucets.These are the right size for attaching to most kegerator faucets. I have Perlick and Intertap and they work great.Only problem is using them on hardwood. If use them on a hardwood I would suggest you go very slow when installing. Only do about a quarter turn and then back it out and then screw it in again and move it a quarter turn further than the last. Repeat repeat this process until it’s all the way screwed in. If you don’t do this, you might end up ruining a tap handle like guided by splitting the wood…Also, the instructions indicate a 33/64 drillbit which is really hard to come by so I used a half inch drill bit and really tried to open the hole up a bit.Lastly, as others have indicated, trying to use a screwdriver to install these is pointless!Get yourself a 3/8 inch bolt and nut and screw it into the insert as shown in the photo. Then use a socket wrench.AND GO SLOW!!!
D**S
Handy but difficult to install
I've bought and used these in a few different sizes on a few different projects and have some opinions to share:1. They're very well made and well machined (I've had one that required chasing with a tap to clean it out)…but…2. They're brass which means they're delicate and easy to ruin, which is easy because…3. The stupid slots are odd sizes and don't really fit standard screw drivers (I will install with a screw in the insert but you're in for a bad time if you need to remove one). You can buy a special tool but it's expensive and sized per insert.4. Very difficult to get these in square. I'd say almost impossible without a drill press…and even then. For smaller sizes where large clamping forces aren't needed, I drill out the hole full size and then set them with a bit of epoxy/urethane glue and find that works well.5. The recommended pilot drill sizes are not always ideal - recommend testing in a piece of scrap wood to get this sorted out before hand.6. per 2 and 3 it's easy to cam these out and FUBAR the slots and/or damage the workpiece. I taken to taping the heck out of the work surface to protect it (also helps prevent tear-out when drilling) but they're nerve wracking to install.Overall they work as promised but installing them is a major pain. Strongly recommend running some tests before diving into the actual work piece to familiarize yourself and to test out installation technique.
A**R
Not what is pictured
Just got these. Haven't used them yet. But I'm not really happy.The interior thread appears to be correct at 1/4-20 but the outer threads that will secure it into the wood are NOT what is pictured. They are very shallow and placed close together. I have had and used the type of insert pictured for many years and they work very well in both solid wood and plywood. I have doubts about these fine threads that have been supplied. The insert does fit the installation tool I have so I'm not returning them just yet. I'll do some testing first and then, perhaps, edit this review. Manufacturers should use actual pictures of the product that they intend to ship!!!Followup: did a trial today. They fit the hole size specified on the package but once in that's it. I tried to back one out and the brass slot drive sheared off. Using the coarse thread ones ( pictured but not supplied ) that I'd had before I was able to remove them and re-use them. Great for temporary jigs. Not these.I'll keep this batch but I won't buy them again. One star removed after the trial use.
G**G
Buy the drill bit
Unless you are installing in soft pine, buy the odd sized drill bit required. I managed to mostly make a half inch drill bit work but I feel I would have gotten better results with the right drill bit. It helps to install using a bolt with a nut on the end into the insert and tighten with a socket set... however i got some finish problems with the top layer of wood splitting or raising. I mostly solved this by using lithium grease on the threads and also predrilling a slightly larger recess just 1mm deep or so using a forstner bit. Ensuring the bolt and insert are perfectly vertical helps too,
C**L
Buen producto, sin embargo sí se requiere adquirir el kit de instalación
Llegó rápido y en buenas condiciones. Un buen inserto fabricado de cobre y orientado a maderas duras principalmente, lamentablemente sí se requiere adquirir por separado la punta especial para su instalación, lo cual encarece esta solución. A diferencia de otros productos similares que existen en el mercado, esta marca de inserto NO se instala con llaves Allen, se puede usar alguna de las herramientas manuales que muestro en estas dos fotos: una punta para desarmador y una ponchadora para cables de red, las cuales pueden entrar en las muescas para hacer girar el inserto e introducirlo en el agujero previamente perforado.
B**R
The kind of wood-hardwood preferred- not soft wood.
Preferred wood is a hardwood, not say pine or similar. The screw length has to be worked out in advance bearing in mind the wood thickness and the depth of thread to go into the insert. The insert hole is 25/64ths for the 1/4 20 insert. This is just over 3/8 . A 3/8 drill will not work in hardwood-too tight and you destroy the insert. So get a correct drill or ream the hole with th e3/8 bit until the insert goes in snugly. Buy the insert tool that you use to screw the insert into the hole-it saves using a slot screwdriver which probably won't fit the insert slot. If you have multiple inserts into a piece to be fastened, you must predrill the piece over the final resting place to accurately mark the insert hole to be drilled. Not much room for error or the inserts will not fit. Otherwise, they can be a nice fastener. Practice in a scrap wood piece before using.
Trustpilot
2 weeks ago
2 days ago