We remain fully operational. Our teams are working around the clock to ensure your deliveries continue safely.

DOWNLOAD THE APP


Customer Services
Copyright © 2025 Desertcart Holdings Limited
DOWNLOAD THE APP

🔌 Plug into perfection — never settle for slow or sloppy connections again!
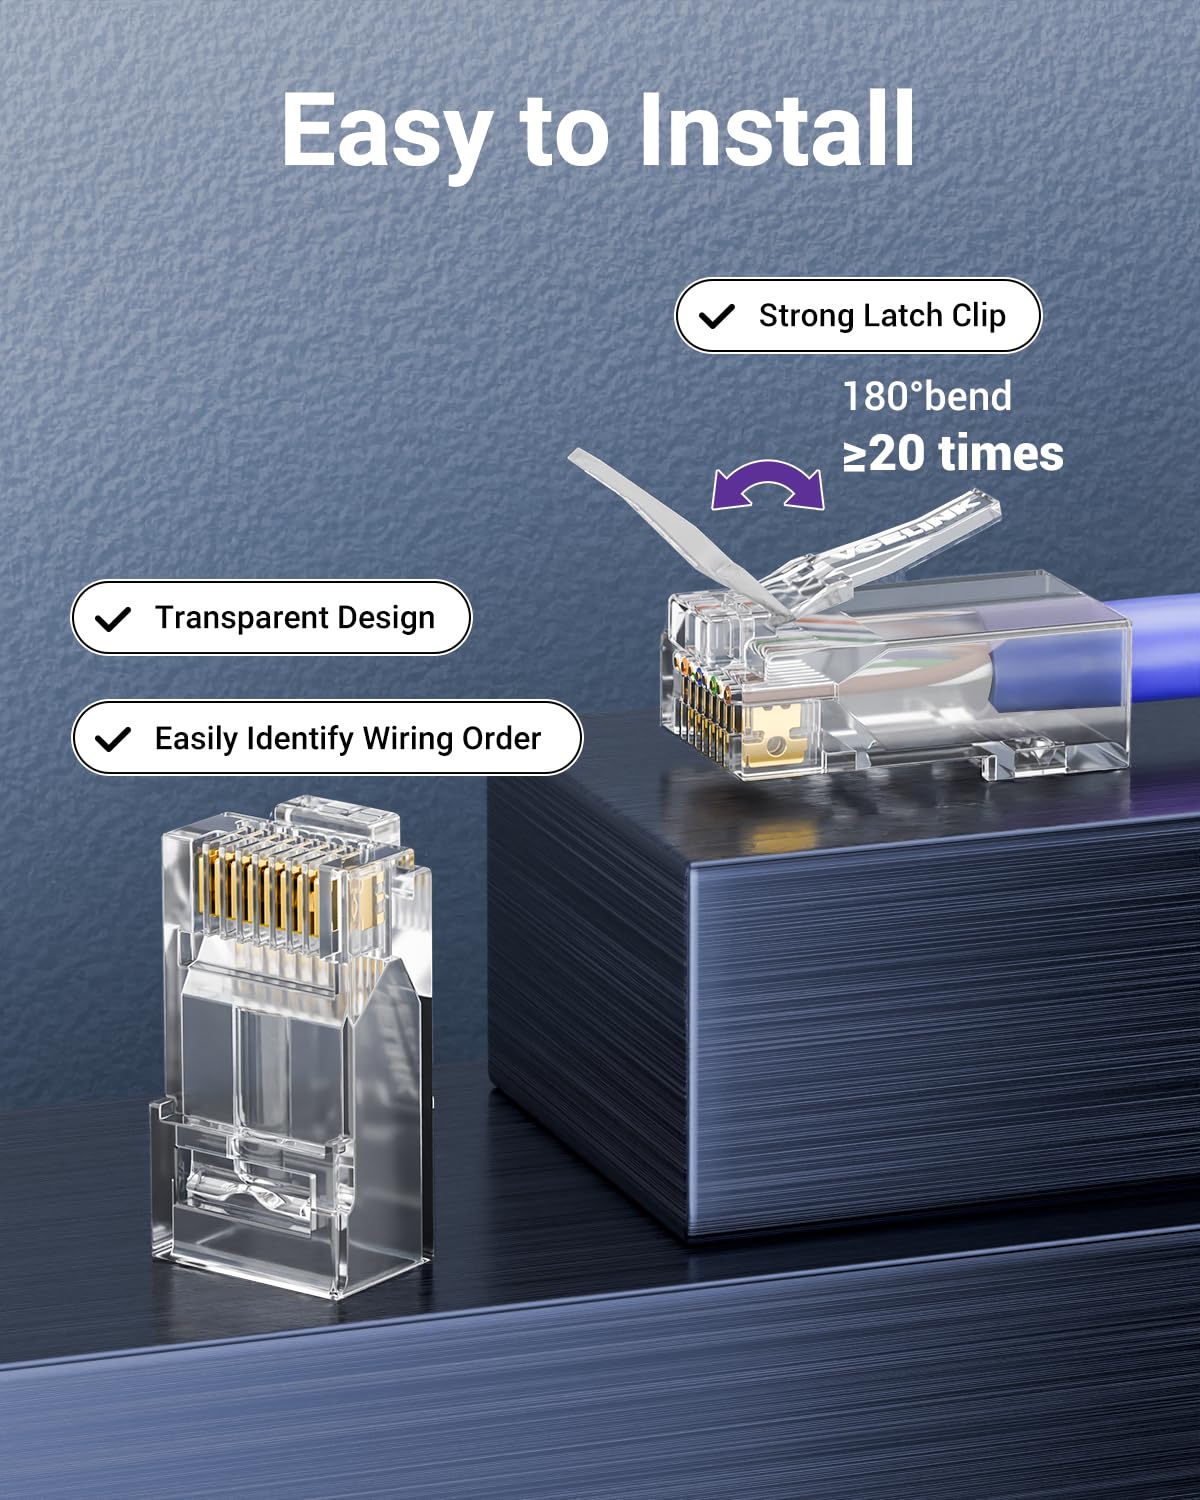
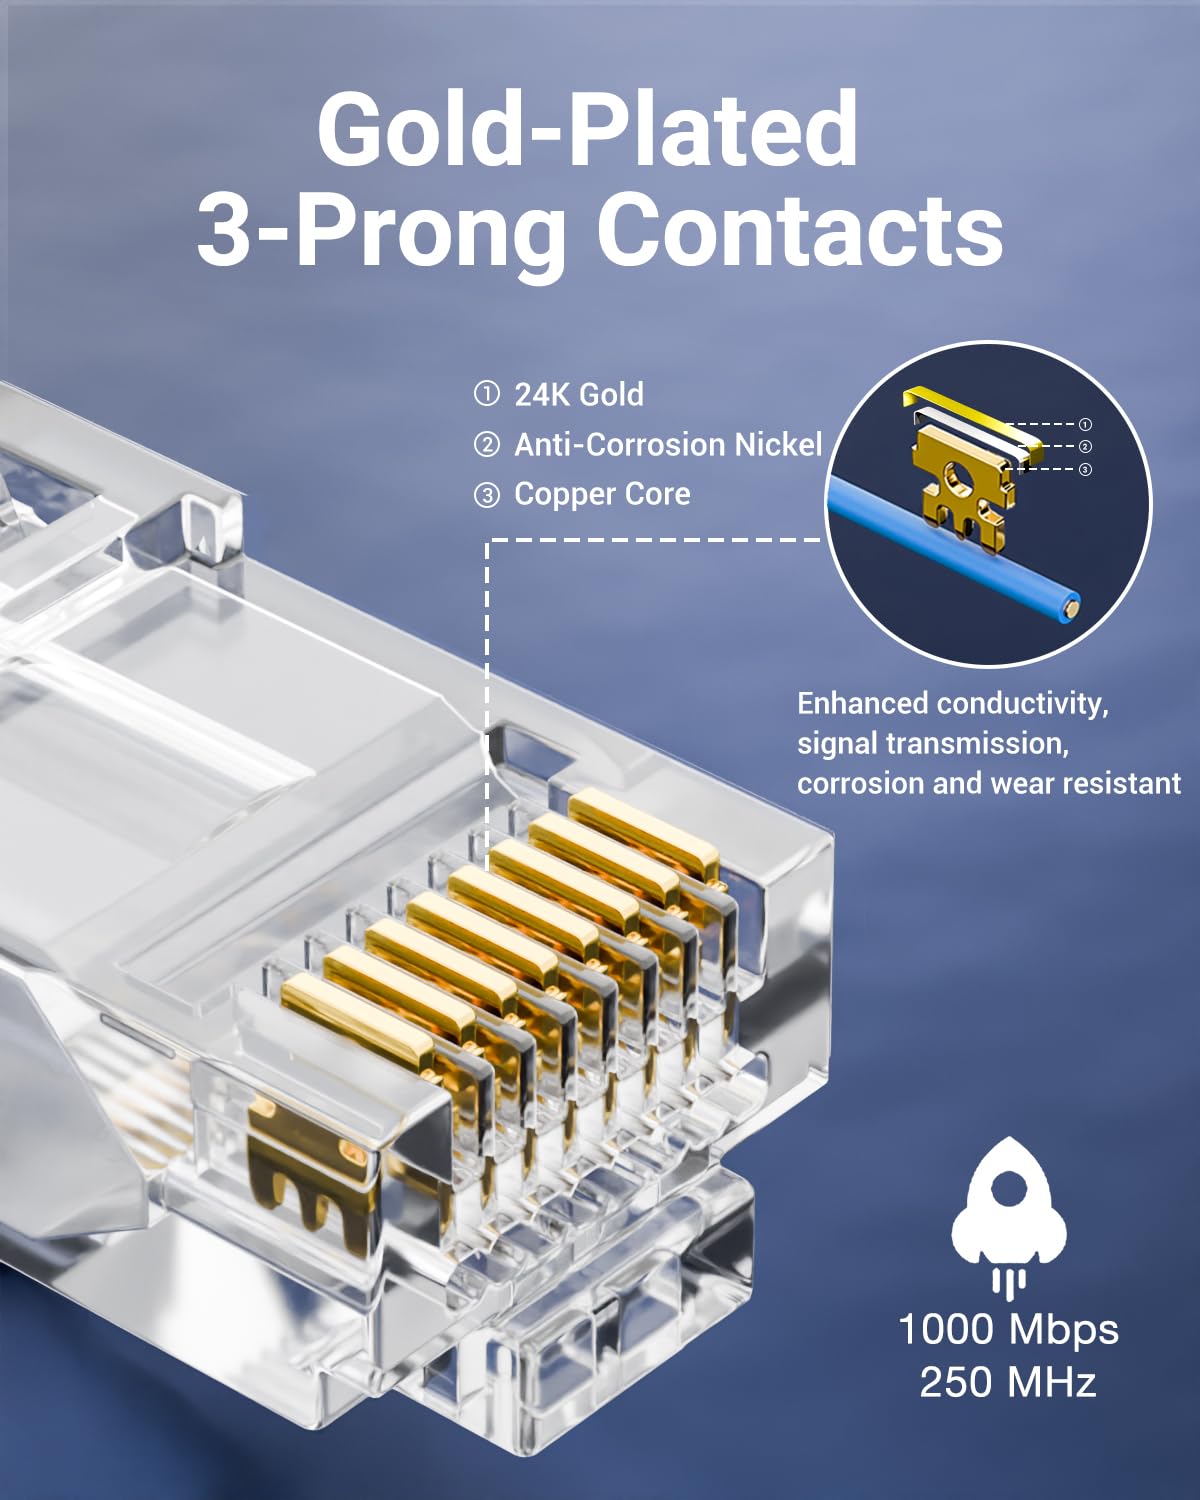
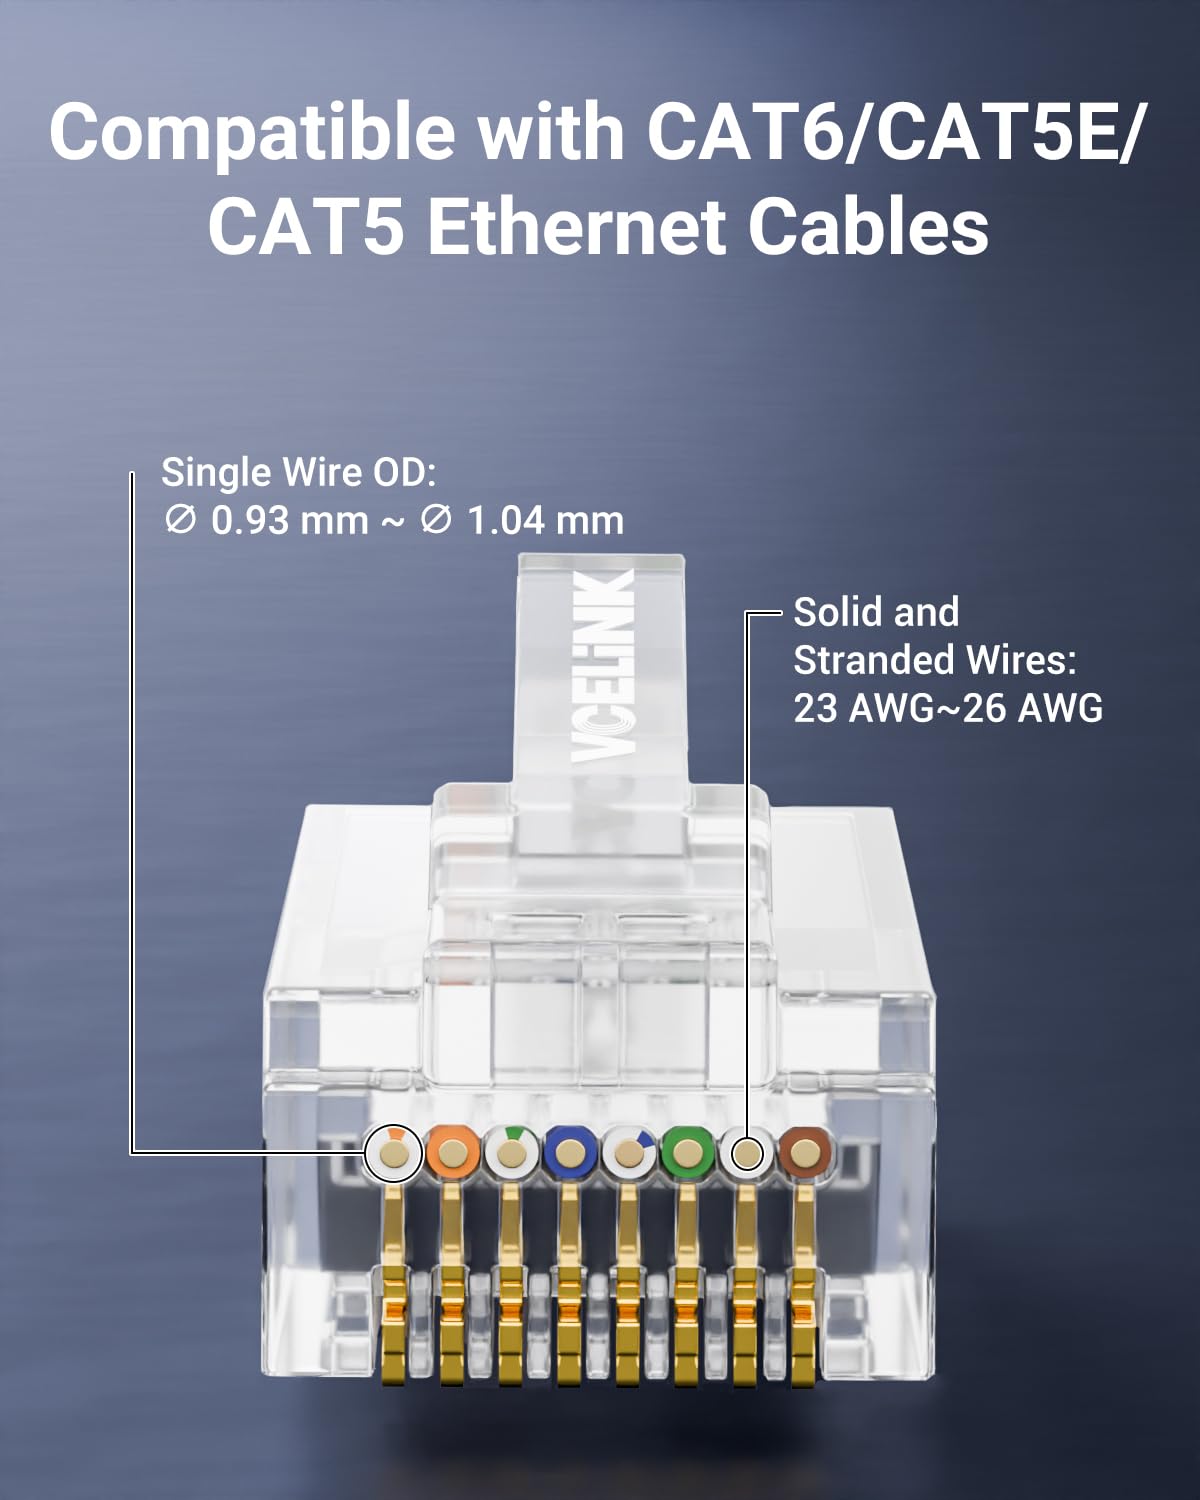
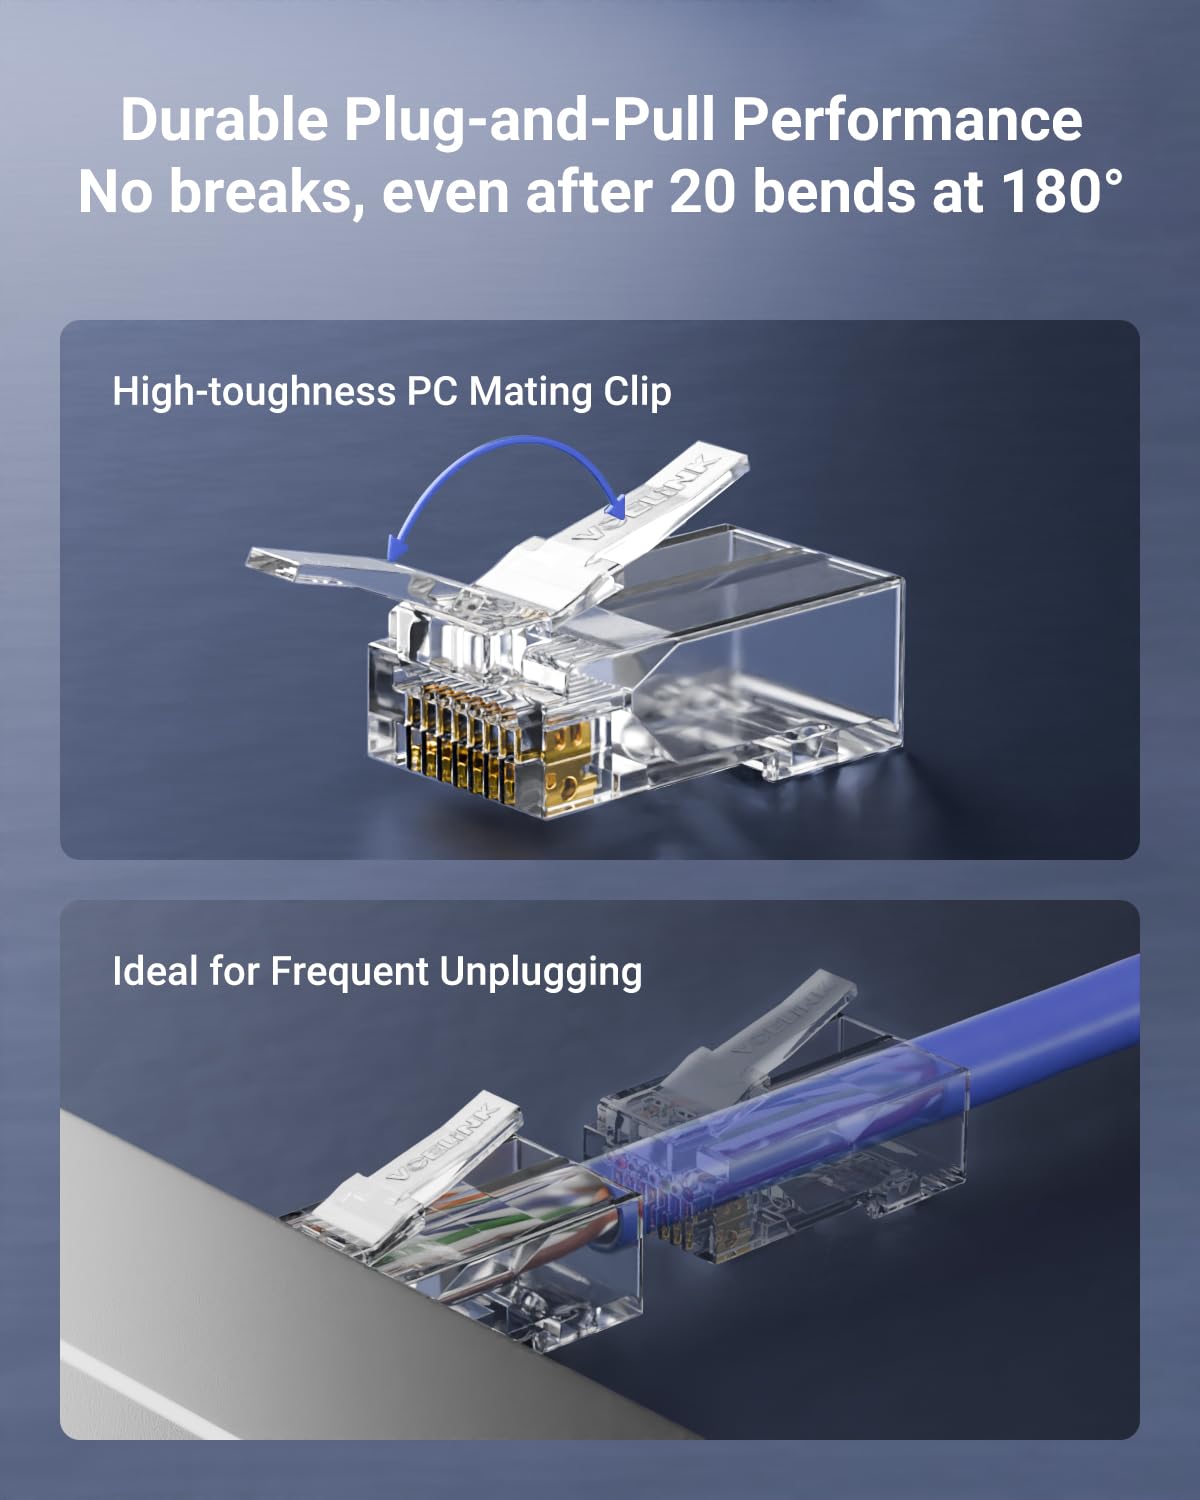
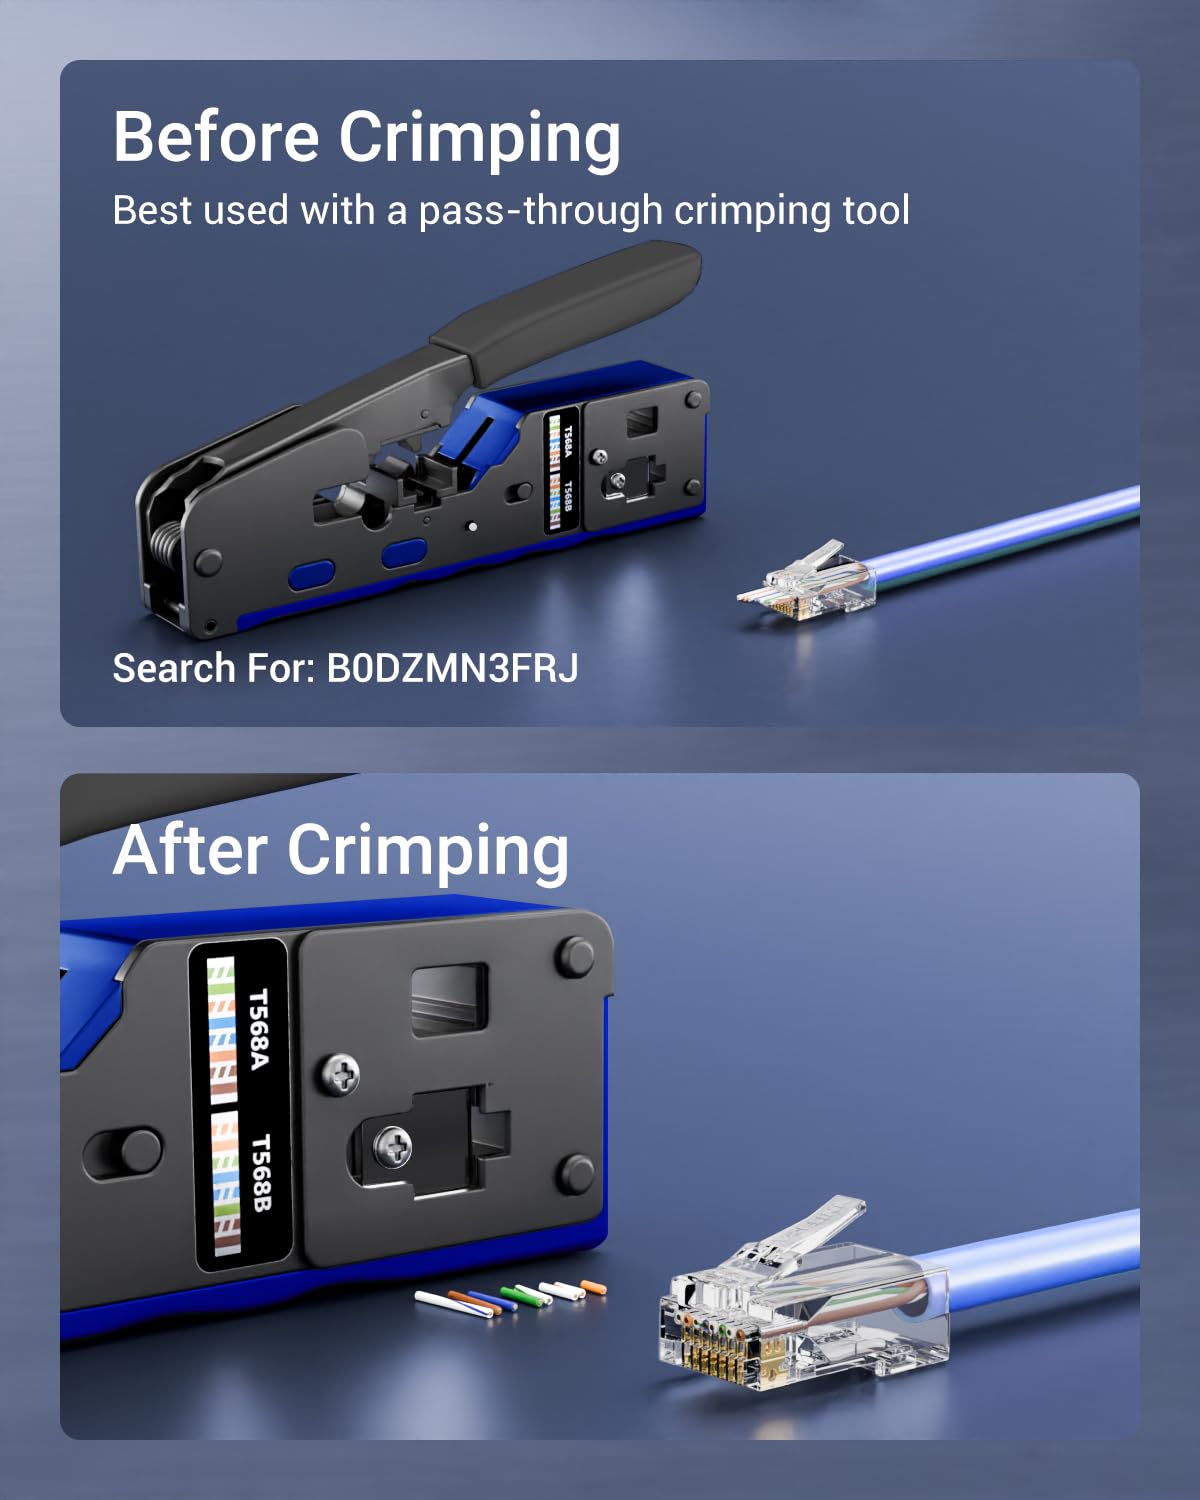
The VCE RJ45 Gold-plated Pass-Through Cat6 Connectors come in a 50-pack designed for quick, error-free cable termination. Featuring transparent covers and pass-through holes, they allow instant wire sequence verification. Compatible with Cat6, Cat5e, and Cat5 cables (solid or stranded), these connectors support up to 1Gbps speeds thanks to gold-plated copper contacts that resist oxidation. Built to perform in extreme temperatures (-20℃ to 75℃), they are perfect for professional-grade networking setups, backed by an 18-month warranty.


| ASIN | B07MM3FQ3F |
| Amperage Capacity | 2 Amps |
| Batteries Required? | No |
| Batteries included? | No |
| Best Sellers Rank | 2,859 in Computers & Accessories ( See Top 100 in Computers & Accessories ) 34 in Cat 6 Ethernet Cables |
| Colour | Transparent |
| Customer Reviews | 4.5 4.5 out of 5 stars (4,039) |
| Date First Available | 8 Jan. 2019 |
| Included components | Operating Instruction |
| Item Package Quantity | 1 |
| Item Weight | 76 g |
| Item model number | SJ661-50P-UK |
| Manufacturer | VCE |
| Material | gold-plated blade |
| Part number | QX-SJ661-50P-UK |
| Product Dimensions | 2.2 x 1.2 x 1.1 cm; 76 g |
| Shape | Flat |
| Size | 50 Pack |
| Special Features | Data Transfer, High Speed, UL Listed |
| Specification met | UL |
| Style | Pass-through type |
Z**E
I
Great product and everything is in perfect order.
D**T
Perfect.. I can't believe I didn't switch to pass-throughs sooner!
After 20 years of wrestling with traditional connectors, I finally tried pass-through style plugs—and wow, what a difference! These connectors have completely transformed my termination process, eliminating unreliable connections. The pass-through design removes all the guesswork, and makes it so easy to ensure you're getting everything right. No more squinting to check if wires reach the pins perfectly (which is harder as you get older for sure!) just push them through, and crimp. With traditional plugs, even careful work could result in dodgy connections. These guarantee success every time. I've had 16 successes out of 16 attempts so far, so that's a great feeling! Obviously these work better if you have the right crimping tool (which has a blade for trimming the excess cable sticking out the plug), but I used them with my trusty 15 year old crimpers and they worked just fine. The only post-processing I needed to do was to cut the excess with flush cut trimmers and a stanley blade. They're good on price too, especially when you consider the cost of losing time and connectors when trying the traditional approach.
D**C
Nice idea; needs practice to get it to work
The concept is good, but successfully fitting these requires some practice, patience and perserverance. I found it easier to take a slightly modified approach compared to the instructions. At first, I found it extremely difficult to work with these and assemble the cable strands into the plug. The strands of Cat5e cable have a mind of their own and (a) tend to go into the wrong grooves, making the order of the wires wrong. (b) kink under the pressure of forcing them into the connector, so you have to pull the ends of the individual strands to straighten them inside the plug. I consulted someone who has done thousands of these at work, and who demonstrated how to do it successfully. Experts make it seem so easy... 1. Remove the sleeve as shown in the instructions. Remove any metal shielding or clear inner plastic wrap, then use a small pair of snips to cut the ground wire off where it enters the outer cable sleeve. Leave the coloured sleeving on individual wires. 2. Separate the individual wires. 3. Straighten the individual wires. This step is essential. You can use your fingers and thumb, or pull the strands across the shaft of a small screwdriver, or flatten them against a bench top. If the wires are not completely straight and curl-free you will struggle to get them into the connector. 4. Arrange the wires in the correct order as shown on the handle of the crimp tool. Flatten them again so that they lie in the correct order without having to twist them. Flatten, flatten, flatten... This is what step five in the printed instructions really means when it says 'Keep the wires neat'. 5. Cut the wires STRAIGHT ACROSS. Step six in the printed instructions says 'Cut the wires at an oblique angle', but I found that allowed the wires to kink and to change order as they slid into the grooves inside the connector. 6. Hold the set of wires the right way round for your chosen wiring schedule (A or B). 7. Hold the connector with the release tab on facing up. 7. Hold the flat set of wires tightly between finger and thumb as you push them into the connector. The individual strands should be running right next to one another, like a ribbon cable, as you push them into the open end of the connector, otherwise they may change order as they slip into the individual channels inside the connector. Step seven of the printed instructions should say 'Push the set of wires into the RJ45 plug'. 8. With the release lever facing up, check the order of the wires after they exit from the front of the connector. 9. Use the tool to crimp and cut. Practice, patience and perseverance are essential... Standard Cat 6A cable will not fit into these plugs. The individual wires are too thick, and they will not go all the way into the connector, so they can't be crimped. These are only suitable for smaller diameter cables like Cat5e.
B**E
UNBELIEVABLE - WHY BUY ANYTHING ELSE?
Originally i bought a kit containing various tools and RJ45's connectors; i watched so many video's on how to do the connections and thought it would be relatively simple to do... WRONG!! Unless you have tiny hands then you maybe able to do this with the old connectors and many many people have, it could of been down to the fact that i had CAT6 cable so the wires and sheath were thicker but i did 6 connectors in total and re-did 4 after and still they didn't work. Desperate times were had and then found the ones with a load bar - again useless as the wires kept springing out when being pushed home, this happened every time so i thought that's it i'm going to have to employ an engineer.. THEN..... I came across these and OH MY GOD these are BRILLIANT; so easy to use and so easy to keep the wires secure even when you use the crimps as you still can pull through the cable tight and crimp. One thing i would say is you DO NOT need to use a specific Crimper as any will do and as i said previously i had one as part of the kit i bought which did the job absolutely fine, ok it didn't remove the excess wires but a simple sharp snap off blade did the job with ease.. All tested and all or working 100% fine. Will never use anything else again; 100% would recommend these connectors
T**N
Connections
Does the job required making the job easier
J**G
Definitely pick these
Great connectors. Great price. Easy to use. And functions like any other plug.
R**S
Makes the job almost too easy!
I came across this style of ethernet plug after recently trying to make some Cat 6 cables for a household job, (installing PoE WiFi access points) and ending up with cables where only 2 or 3 of the 8 wires would send a signal. I use to rack mount data centres a couple of decades ago, and was very practiced at making ethernet cables, but I seem to have lost the knack. Even back then, I remember could be a bit hit or miss. This pass-through style of plug (and the matching crimp tool) is a game changer, and makes the job quick and pretty much idiot-proof. I should point out that I'm using stranded Cat 6, not solid core. I know there's a lot of debate about this on various Internet forums, but in practice, I've had absolutely no problems with PoE or getting Gigabit speeds over stranded cable at lengths of up to 20 metres. I would only use solid core for runs of more than 20 metres or where I need weather-proof cable... and in those cases, I'd terminate it with a wall socket at each end, not a plug. Just my two cents.
E**D
Lätta att använda när man kan ha längre trådar och ser var dom ligger i kontakten i och med att dom går igenom kontakten
J**R
Comme il faut.
E**A
Ottimi e innovativi facili da crimpare
R**N
Simpel en effectief
K**N
iyi
Trustpilot
1 week ago
2 days ago