🎵 Elevate your drive with flawless sound—because your ride deserves the best
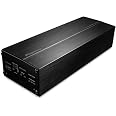
The PIONEERGM-D1004 is a sleek, black 4-channel car amplifier delivering 400W of clean power with less than 0.05% distortion. Featuring the innovative TVC concept and smart input sensor, it offers easy plug-and-play installation and seamless integration with OEM radios, covering a wide frequency range of 10-40,000 Hz for an immersive audio experience.


| Item dimensions L x W x H | 7.13 x 2.52 x 1.5 inches |
| Voltage | 45 Volts |
| Manufacturer | Pioneer |
| Maximum Supply Voltage | 12 Volts |
| Minimum Supply Voltage | 12 Volts |
| Mounting Type | Surface Mount |
| Brand | Pioneer |
| Number of Channels | 4 |
| Output Power | 4E+2 Watts |
| Package Type | Box |
| Specification Met | Oem |
| Supply Current | 8.89 Amps |
| Global Trade Identification Number | 04988028265648 |
| Model | GM-D1004 |
| Item Weight | 2.27 pounds |
| Product Dimensions | 7.13 x 2.52 x 1.5 inches |
| Item model number | GM-D1004 |
| Is Discontinued By Manufacturer | No |
| Manufacturer Part Number | GM-D1004 |
| Wattage | 180 watts |
J**P
Excellent amp, extremely easy installation.
Have this running a set of Audison APK130 component speakers fully active with signal from a Pioneer headunit.Sounds fantastic and plenty of power.Extremely simple to install. Literally plug and play if you're using a headunit with ISO connections. No need to run additional power to the battery if your stereo circuit has enough power.Unit is very small so easy to hide in or behind the dash. Comes with some mounting screws but I just used velcro to stick it to the carpet behind the glovebox.Only minor complaints would be no gain control and fixed wire lengths can limit placement and/or a pain to tuck away.
K**S
What a difference
Installed this plug and play unit in my 2012 honda (you need an ISO t-harness specifically for your car - usually £10-20 if you want a plug and play install). Was a breeze and made a huge difference- 20-30mins.Prior to the installation I upgraded all four 6.5” (17cm) speakers on all four doors. I added JBL stage 2 components in front (45w rms - £60) and Cerving Vega red 2 ways in rear (65w rms - £100)There was no bass and the speakers weren’t loud. Not a surprise as the factory head unit puts out 10w rms per channel tops. So not enough for the speakers that I installed.But after adding this compact amp, which beautifully fit behind the head unit, the audio is so loud that is impossible to listen to it at max volume. I tried it, and there was no distortion.On youtube I’ve see this amp tested. And it truly provides over 45Wx4. The test showed over 50W rms per channel. The amp also doesn’t get warm. And most importantly, nobody would guess that my 2012 car with a factory head unit has an upgraded system until they hear it. I did not have to cut or splice any of the factory wires.There are no crackles, pops or unwanted noise from the amp. It is perfect. I have plenty of mid bass with the speakers I purchased and they will do. But if I wanted to, I could also add a subwoofer. But I am very happy with the outcome and will keep things as is. Hope this review helps.
M**.
4x45w or 2x90w bridged Superb!
Been running this amp for a year now and it's been perfect. As to the other review that states there are no instructions on how to bridge this amp. There are instructions in the manual and it tells you which wires to connect, but they're not very clear and obvious. You also have to do this yourself and remove the pins from the connector and reconnect in a different order. This is very easy to do with a pin removal tool (or even a paperclip). I removed the four pins not needed anymore as I have no intention of running rear speakers and heat shrinked them, leaving only four pins connected in bridged mode for two front speakers. The only issue I encountered with install was that the outer casing picks up interference and causes noise through speakers if it touches any chassis part which is earthed. You need to make sure the amp is isolated from the body. A ground loop isolator will remove the noise but also reduces low frequencies. Mine is installed in my glove box. Takes up hardly any space as it's so small. It's isolated, well ventilated and easy to remove if any faults. Sound quality is superb for the price. I did test it with 4x45w to begin with and even 2x45w and the sound is good and a massive improvement over a stock head unit amp. Being able to bridge makes it a really versatile amp and able to drive aftermarket speakers correctly. The instructions should be clearer and a pre made off connector for bridged mode would make it easier for people to utilize this feature. Take your time and install it correctly and it's a really good amp for the price.
T**S
Powerful little amp
Plugs straight into your iso harness and fits in the space below double din in a golf mk5. I’ve connected it to a sony Avx ax5550d which has a small body for cars with little space. The only issue I had was at high volumes some functions on my Sony head unit stopped working or became sluggish. Once volume decreased it was fine. So I ran a separate ignition live to my Sony head unit from the fuse box in the car and now all is fine. The amp is good enough to drive the 3 way set of focals in the front, and the 2 way set in the rear panels on 3 door golf gt, where the Sony struggled even though the Sony has a higher power per channel rating than the pioneer. Now the focals are alive and punchy. Good amp for its size I’m really impressed with my system. Got the alpine sub and pioneer mono amp in the boot too. If anyone needs help just ask.
T**N
Installed in Golf Mk6 OEM radio. Certainly improved the ...
Installed in Golf Mk6 OEM radio. Certainly improved the sound quality with more depth and imaging to the music and spoken voices. Well worth the investment, suggest trying this amp out prior to swapping out the OEM speakers. I had to purchase a fully populated ISO harness then its simply plug and play.
S**
Transparent in sound and operation (most of the time)
Fulfilled my expectations. Tonally it seems no different than the factory head unit, which just indicates its high level of transparency (a good thing). It's capable of delivering significantly more power than the factory head unit and this has enabled me to fit some better sounding after market speakers that were not quite as efficient as the factory speakers and still turn it up when the mood takes. Its not capable of blasting huge SPL, but I doubt anyone considering this would be expecting that. The compact size meant I managed to find a perfect spot for it behind the glove box. The high pass switches should come in handy when I fit a small subwoofer as it should stop the door speakers having to work so hard hopefully further improving sound quality. The only slight niggle is that my car has stop / start and in traffic there can be a momentary interruption to the sound when the car starts back up, which was not an issue with the factory head unit on its own. Also if the volume is very high when the stop / start activates the sound can cut out entirely as the amplifier senses the voltage drop and puts itself in protection mode. Not a big deal for me as its quite rare for me to listen at very high volume, but something to bear in mind if you do enjoy your music very loud.
Trustpilot
1 month ago
2 months ago