
Desert Online General Trading LLC
Dubai, United Arab Emirates
Desert Online General Trading LLC
Dubai, United Arab Emirates


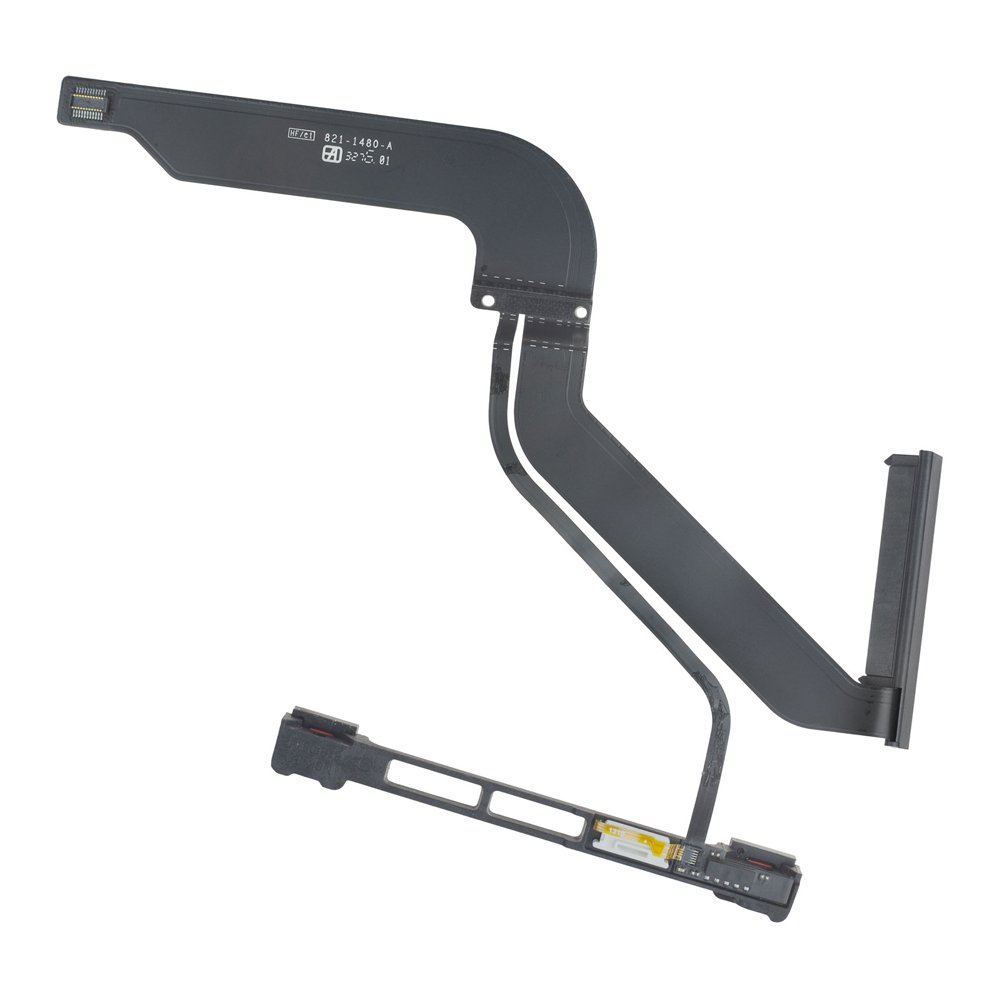


MMOBIEL Replacement HDD Hard Drive Ir Sensor Sleep Detector Cable Compatible with MacBook Pro A1278 13” 2012 821-1480-A
D**N
Worked!!!
In case you didn’t know...and a lot of us didn’t, there seems to be a problem with older MacBook Pro models. This seems especially true for the mid-2012 machines. The cable leading from the drive to the mainboard is thin and fragile. If the cable fails or becomes damaged, it leads to mind-numbing problems that can be very hard to track down. In my case, the machine worked but now and then, I’d get the NoOS warning. When it did run, the HD was agonizingly slow. I tried maxing out the memory and changed the HD for a SSD but it didn’t help. In fact, the machine completely failed to recognize any SSD...and I tried three of them.Doing online research I found that the cable problem is well known and was likely the issue with my 2012 MBP. With nothing to lose, I ordered this replacement cable from Amazon. It’s cheap but it seems to work and it certainly cleared up the problems with my MBP.If you’re a DIY person, replacing the cable is fairly easy. This particular kit comes with the two screwdrivers needed. I would recommend getting an extra set of screws for your machine at the same time because they are tiny and the heads are easy to strip. I also recommend using electrical tape to cover the surfaces the cable comes in contact with inside the computer to provide an extra layer of insulation. There are videos online that go over the steps in detail.
A**R
The ONLY Replacement Cable You Should Get For Your MacBook Pro
The SATA cable that Apple used on its 2012 MacBook Pro (non-retina) is one of that machine's only weak spots. I've had several go bad, and one of the first things that I do when refurbishing one of these machines is to replace the stock cable, regardless of whether it's bad or not. It *will* be eventually.There are quite a few on the market, but what sets this apart from the others is the included IR sensor, sleep LED, and bracket. Without these inclusions, you're left trying to force the tiniest ribbon cable ever conceived of by man into an even tinier ZIF socket in order to reuse the existing IR sensor and sleep LED, something that can and will never end well. Save yourself the heartbreak and eye strain by getting this cable which installs in all of about five minutes. You don't even need tools, because included with the cable is every tool you might possibly need to do this: a spudger, guitar pick tool, and two screwdrivers (Phillips and Torx).I also recommend this for the 2011 model of the 13" MacBook Pro; though there is another cable available that is purportedly specifically for that model, the 2012 and 2011 MBP is virtually identical internally, and I find that this slightly beefier cable is slightly less prone to issues than the spindlier 2011 version.
M**S
Error solved!!!
Ok so I got this 2012 Mac and everything seemed ok until out of the blue started to shut off by itself and keep telling me that system crash because of something wrong, I did the whole check and it came back to the same problem something about the battery and the hard drive, I knew the hard drive wasn’t the problem because I just updated it and nobody had any idea of what the problem was, I called Apple and since the model is a 2012 they could not help with that older model, so I kept searching until I saw an old question and the main answer was this part to be replaced, so since I was getting frustrated about the shutting down and unable to download the new update for the Mac, I took the chance and there it is, finally working like new, I was able to update my Mac and since then no more shut downs, the installation it’s very easy even when the tape on the cable did not hold that well, I was able to still put it in and now no more problems.
S**Y
Fantastic part
Apple told me that it would cost $300 to fix my computer and I found this part and did it myself ! The part was easy to install and was exactly like the part Apple was trying to get me to buy
R**3
Great Product, Great Price!
I thought my HDD died but later figured out its the cable. I didnt care bc i use my optical bay for an SSD, but decided to finally get this fixed so I can prolong my SSDs lifespan by not writing to it anymore. This product is great and they also include the tools to get the job done! One thing i really appreciated was that the tutorial i watched, the instructor will have you remove the small ribbon by the white piece and replace it, but by buying this product they already included a new part with that assembled already so that made made installation quicker and easier. I finally have 2 drives in my 2012 mbp again. Thanks!
R**R
This is what you need
The kit has two of the hard parts pre-assembled: The SATA connector (you get a new one) and the IR lead and hold-down bracket (these are new two). YouTubes on replacing the cable usually show you how to hook the new cable to the old connectors and it's intimidating. Here, the heavy lifting is done for you. I knocked off a star because the screw driver didn't fit the MacPro case (too large). Also, the IR connector wasn't exactly right, but the adhesive allowed for some wiggle. And yes, my MacPro is working again.
K**A
High quality cable and the bracket makes installation easier!
I normally don’t write product reviews, but I am hoping this will help someone out there! I was hesitant to buy this, but I had nothing to fear! I decided to upgrade the HDD to an SSD on my trusted 2012 MacBook Pro. Little did I know that my SATA cable was already toast, and even though it was working with the HDD, it could not cope with the SSD. Hours of reformatting, cloning and uncloning, resetting PRAM etc did not help. What helped was this SATA cable! Very easy to install, and the bracket makes you by pass the most fiddly bit of installation. I was also impressed by the quality of the tool that were included! The screwdriver is definitely high quality. Just follow the instructions on You tube, put some insulating tape on the metal body to make the cable last longer. It’s early days, but I am happy. Hopefully the cable is of high enough quality and it lasts a long time. Go for it!
B**Y
as expected but the sensor wasn't properly glued
Hard to find the root cause of a Mac problem when it seems that the hard drive is the failure. But found in some forums that the cable was the main problem. Replaced the cable and everything went back to normal.The cable is as described. I got the one with the sensor already installed with the bracket but the sensor was not placed correctly. This is a critical part because if this breaks then the cable will not work. Had to push it gentle to its place and very careful not to break it or move it (see picture attached).It would have been nice to get the installation instructions or a link to a video tutorial but it was easy to find one online and it is a very straight forward process.
M**N
Perfect fix for MacBook that will boot from HDD but doesn't recognise SSD
I bought a secondhand MacBook Pro 2012 13" to replace my recently dead 2011. It was good deal but needed an SSD and a RAM upgrade to bring it up to speed. RAM installed I set about trying to install a new SSD. The SSD would format fine in an external caddy but every time installed it into my new MacBook and I tried to install Mac OS via a bootable USB stick, the MacBook would either not recognise the SSD or if I did manage to get it to be recognised , the install either failed or the one time I did get it to install, it wouldn't start and instead gave 'flashing folder' (is not found) errors.The weird thing was that every time I put the original mechanical HDD back in, the MacBook would start fine.After much confusion, frustration and googling, I fould that a lot of other people had similar problems with 2012 MacBooks. Seems the SATA cable that connects the drive to the logic board can fail over time or even if it works with a HDD, is unable to deal with the increased throughput from a faster SSD.So with nothing to loose, I bought this kit.After a 10 minute install, I was up and running, SSD recognised and was installing Mac OS.Install successful and new MacBook living up to its fully potential. Man it's amazing how slow a mechanical drive is once you're used to SSD!! So glad to get this sorted. Great life saving, reasonably priced bit of kit!
J**B
saved a macbook pro!
saved a macbook pro i had my hands on, the hard drive wasn't recognized (even in the disk utils in recovery mode - the hardware test saying everything was fine on the computer) because this part certainly broke after the computer fell. the hard drive was still working when put in an external enclosure. once this part replaced (search for the ifixit tutorial on google on how to change this part) everything went fine. replaced the hard drive by a ssd at the same time and installed the (natively unsupported) macOS catalina, the mac just got a second life! :-)just a little precision, the original cable is folded to fit between the superdrive and hard drive shapes, with two tiny screws in this area. personally i didn't take te risk to fold it, i just put the screws in their holes so they are here if i needed one day and then let the cable pass from the top part of the superdrive to the bottom of the hdd/sdd, i feel like it's less risky for it to get damaged again...if needed: macbook pro 8,1 (late 2011) 13" model A1278.the tools provided are of good enough quality even though i used another set of screwdrivers. i preferred this kit as the one without the LED/IR receptor part so i was sure not to break anything if i had to combine the stock/new part here but i guess that if you are more experienced you can go for the kit with no tools and that IR/LED part...
S**T
Fixed by unibody Macbook Pro fault - non booting ? file
A little bit of research suggested the fault with my 2011 Macbook Pro was potentially the hard disc cable. The machine would only display a grey screen with a file logo with a question mark. It would boot off the wifi so I decided this might be worth a go. The supplied screwdriver and hex-driver were both the correct size, and once the back was off it was fairly straight forward to remove the hard disk and swop over the cable part. The part of the new cable had a Scotch 3M glue tape to stick it down under the drive, however I took the decision after peeling off the old one (which didn't come away very clean) not to apply the tape backing more so for the ability to align the cable correctly in the first place. Everything seems back to normal and also using the supplied tool I removed the fan and cleaned out the years worth of fluff, so it also runs considerably cooler now. Well worth the money.
Trustpilot
2 weeks ago
3 days ago
4 days ago
2 weeks ago